- Get link
- X
- Other Apps

25 Delicious Dinner Ideas for Every Night of the Week
Looking for some fresh dinner ideas? Whether you're cooking for yourself, the family, or impressing guests, we've got a variety of tasty options that won't require hours in the kitchen. From quick weeknight meals to more elaborate dishes for special occasions, there’s something here for every palate and occasion. Let’s dive in!
Stuffed Bell Peppers with Quinoa and Black Beans
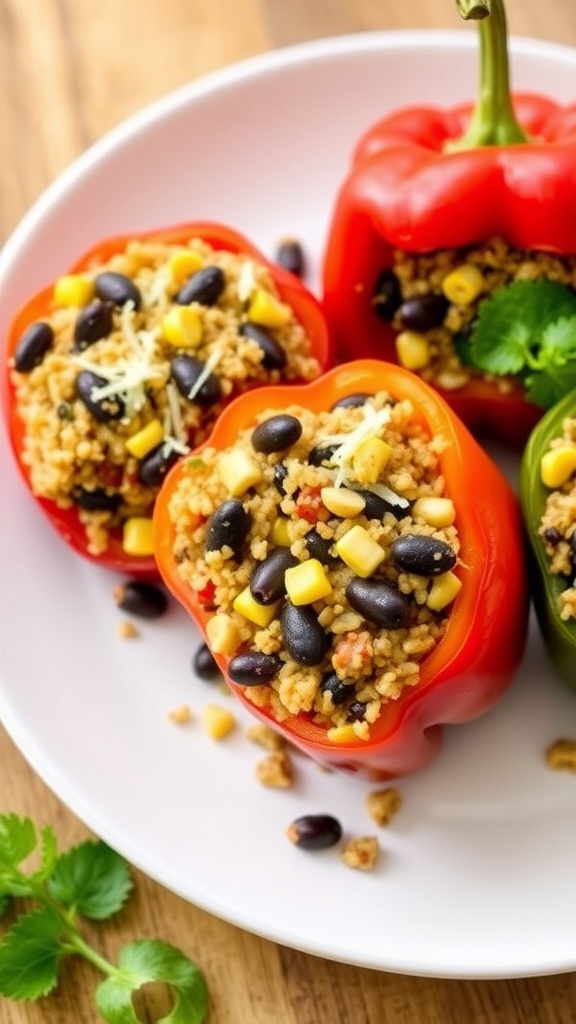
Stuffed bell peppers are a delightful and nutritious dish that’s easy to prepare. These colorful veggies are filled with a tasty mixture of quinoa, black beans, corn, and spices, offering a satisfying meal that’s both filling and packed with flavor. The sweetness of the bell peppers complements the savory stuffing, making each bite enjoyable.
This recipe is not only simple to make but also versatile. You can customize the filling with your favorite ingredients, whether you want to add more veggies, switch up the grains, or toss in some cheese. It's a great way to use up leftovers and create a wholesome dinner that everyone will love.
Ingredients
- 4 large bell peppers (any color)
- 1 cup quinoa, rinsed
- 2 cups vegetable broth
- 1 can black beans, drained and rinsed
- 1 cup corn (frozen or canned)
- 1 can diced tomatoes (with juices)
- 1 teaspoon cumin
- 1 teaspoon chili powder
- Salt and pepper to taste
- 1 cup shredded cheese (optional)
- Fresh cilantro for garnish
Instructions
- Preheat your oven to 375°F (190°C). Cut the tops off the bell peppers and remove the seeds. Place them in a baking dish, cut side up.
- In a medium saucepan, combine quinoa and vegetable broth. Bring to a boil, then reduce to a simmer and cover. Cook for about 15 minutes or until the quinoa is fluffy and the liquid is absorbed.
- In a large bowl, mix the cooked quinoa with black beans, corn, diced tomatoes, cumin, chili powder, salt, and pepper. Stir until well combined.
- Spoon the quinoa mixture into each bell pepper, packing it down slightly. If using cheese, sprinkle it on top of the filling.
- Cover the baking dish with foil and bake for 25-30 minutes. Remove the foil in the last 10 minutes to allow the cheese to melt and brown slightly.
- Remove from the oven and let cool for a few minutes. Garnish with fresh cilantro before serving.
Vegetable Stir-Fry with Tofu
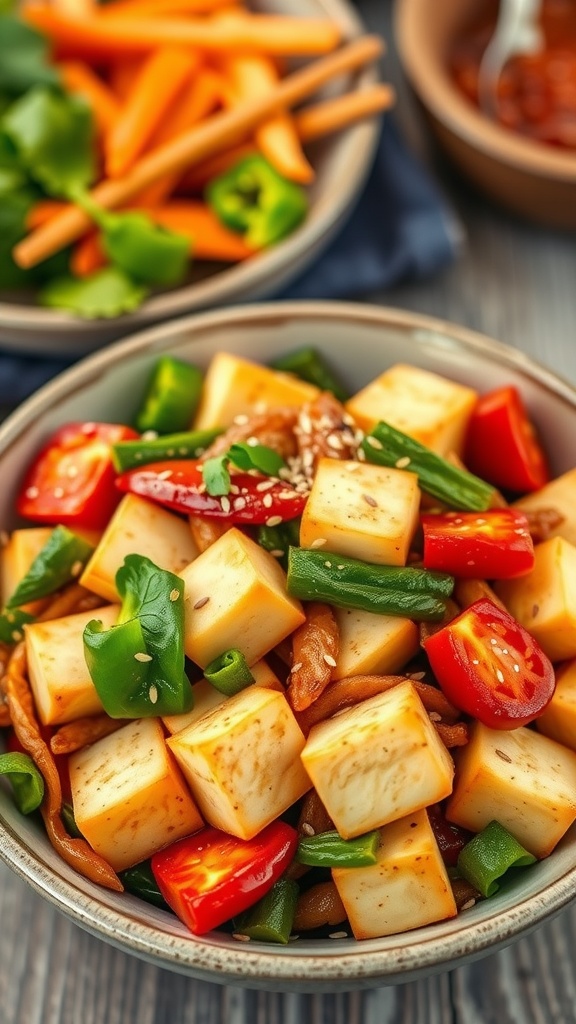
If you’re looking for a quick and tasty meal, a vegetable stir-fry with tofu is a fantastic choice. This dish is not only vibrant and colorful, but it also packs a punch of flavor and nutrition. The combination of fresh vegetables and protein-rich tofu makes it satisfying and hearty without being heavy.
Making this dish is straightforward and can be done in under 30 minutes, making it perfect for busy weeknights. You can customize it with your favorite veggies and sauces, ensuring it suits your taste buds. Here’s how you can whip it up!
Ingredients
- 14 oz firm tofu, cubed
- 2 cups broccoli florets
- 1 bell pepper, sliced
- 1 cup snap peas
- 1 carrot, julienned
- 2 tablespoons soy sauce
- 1 tablespoon sesame oil
- 2 cloves garlic, minced
- 1 teaspoon ginger, grated
- Sesame seeds for garnish
Instructions
- Prepare the Tofu: Drain the tofu and press it to remove excess water. Cut it into cubes and set aside.
- Cook the Tofu: Heat sesame oil in a large pan over medium heat. Add the tofu cubes and cook until golden brown on all sides, about 5-7 minutes.
- Add Vegetables: Stir in the garlic and ginger, then add the broccoli, bell pepper, snap peas, and carrot. Cook for another 5-7 minutes until the vegetables are tender-crisp.
- Season: Pour in the soy sauce and toss everything together, allowing the flavors to meld for 2-3 minutes.
- Serve: Transfer to a serving bowl, sprinkle with sesame seeds, and enjoy your delicious vegetable stir-fry!
Classic Beef Stroganoff with Egg Noodles
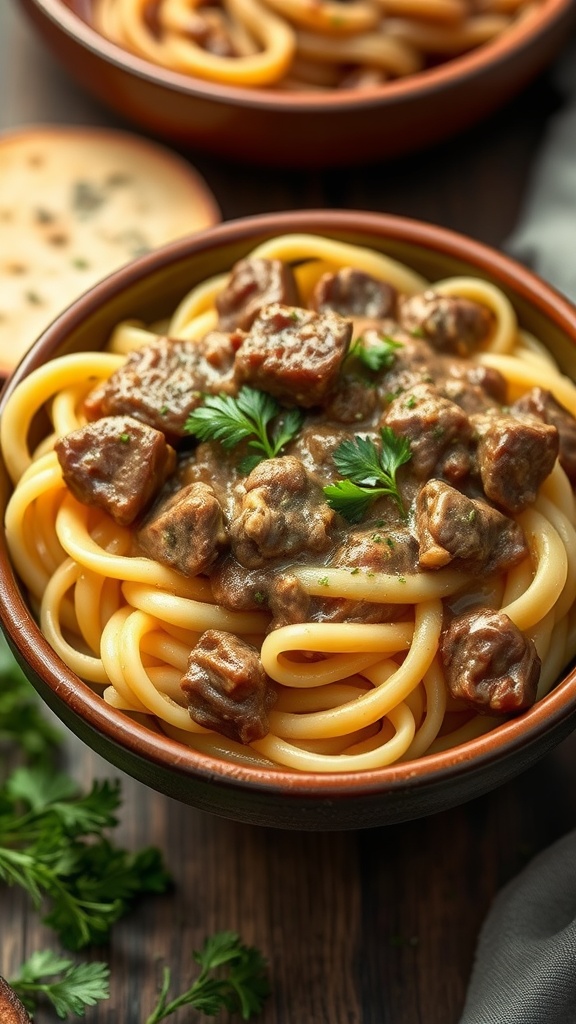
Classic Beef Stroganoff is a comforting dish that brings together tender beef, creamy sauce, and egg noodles in perfect harmony. The rich flavors and velvety texture make it a favorite for family dinners and gatherings. Plus, it’s pretty simple to whip up, making it ideal for a weeknight meal.
This dish is all about balance; the savory beef pairs beautifully with the earthy mushrooms and the creamy sauce, creating a delightful mix of flavors. Serve it over egg noodles for a hearty meal that everyone will love.
Ingredients
- 1 pound beef sirloin, cut into thin strips
- 2 tablespoons olive oil
- 1 medium onion, diced
- 2 cups mushrooms, sliced
- 2 cloves garlic, minced
- 1 cup beef broth
- 1 tablespoon Worcestershire sauce
- 1 tablespoon Dijon mustard
- 1 cup sour cream
- Salt and pepper to taste
- 8 ounces egg noodles
- Fresh parsley, chopped for garnish
Instructions
- Cook the Egg Noodles: In a large pot of salted boiling water, cook the egg noodles according to package instructions until al dente. Drain and set aside.
- Brown the Beef: In a large skillet, heat olive oil over medium-high heat. Add the beef strips and cook for 3-4 minutes until browned. Remove the beef and set aside.
- Sauté the Vegetables: In the same skillet, add the diced onion and sliced mushrooms. Sauté for about 5 minutes until the onions are translucent and the mushrooms are tender. Stir in the minced garlic and cook for an additional minute.
- Add the Sauce Ingredients: Pour in the beef broth, Worcestershire sauce, and Dijon mustard, stirring to combine. Bring the mixture to a simmer.
- Finish the Stroganoff: Return the cooked beef to the skillet and stir in the sour cream. Allow the mixture to heat through, then season with salt and pepper to taste.
- Serve: Spoon the beef stroganoff over the egg noodles and garnish with fresh parsley before serving.
Herb-Crusted Salmon with Asparagus
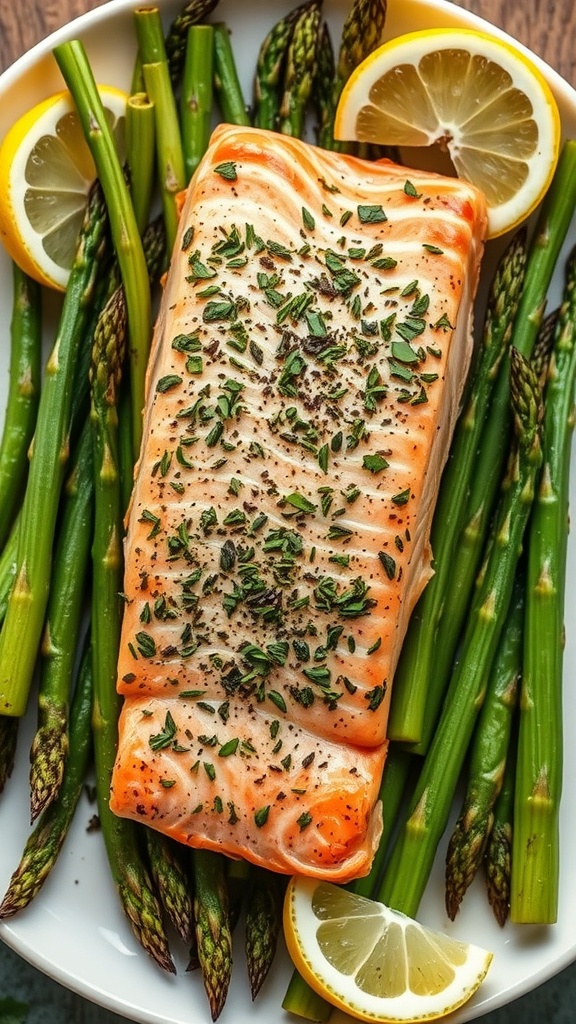
This herb-crusted salmon with asparagus is a delightful dish that perfectly balances flavor and nutrition. The flaky salmon is infused with fresh herbs, creating a light yet satisfying meal. Paired with tender asparagus, it's simple to prepare, making it an ideal choice for a weeknight dinner or a special occasion.
The combination of the herb crust and the brightness of lemon elevates the dish, providing a burst of flavor in every bite. Not only does it taste delicious, but it's also packed with healthy fats and vitamins, making it a wholesome option for dinner.
Ingredients
- 4 salmon fillets
- 2 tablespoons olive oil
- 1 teaspoon garlic powder
- 1 teaspoon dried thyme
- 1 teaspoon dried oregano
- Salt and pepper to taste
- 1 lemon, sliced
- 1 pound asparagus, trimmed
Instructions
- Preheat your oven to 400°F (200°C).
- In a small bowl, mix olive oil, garlic powder, thyme, oregano, salt, and pepper.
- Place the salmon fillets on a baking sheet lined with parchment paper and brush the herb mixture generously over the top of each fillet.
- Arrange the asparagus around the salmon on the baking sheet, drizzling with a little olive oil and seasoning with salt and pepper.
- Top each salmon fillet with a lemon slice.
- Bake in the preheated oven for 12-15 minutes, or until the salmon flakes easily with a fork and the asparagus is tender.
- Serve warm and enjoy your flavorful, herb-crusted salmon with asparagus!
Spicy Shrimp Tacos with Cilantro Lime Sauce

Spicy shrimp tacos are a fun and flavorful dish that's easy to whip up for dinner. The combination of succulent shrimp, zesty lime, and fresh cilantro creates a vibrant taste that’s sure to excite your palate. These tacos are perfect for a weeknight meal or a casual gathering with friends.
With their spicy kick and creamy cilantro lime sauce, these tacos are both satisfying and refreshing. Plus, they come together in no time, making them a great option when you want something delicious without a lot of fuss.
Ingredients
- 1 pound shrimp, peeled and deveined
- 1 tablespoon olive oil
- 2 teaspoons chili powder
- 1 teaspoon cumin
- Salt and pepper to taste
- 8 small corn tortillas
- 1 cup shredded cabbage
- 1 avocado, sliced
- Fresh cilantro, for garnish
- 1 lime, cut into wedges
Instructions
- Season the shrimp: In a bowl, toss the shrimp with olive oil, chili powder, cumin, salt, and pepper until well coated.
- Cook the shrimp: Heat a skillet over medium-high heat and cook the shrimp for 2-3 minutes on each side until they turn pink and are cooked through.
- Warm the tortillas: While the shrimp is cooking, warm the corn tortillas in a separate pan or microwave until pliable.
- Assemble the tacos: Place some shredded cabbage on each tortilla, top with the cooked shrimp, and add avocado slices.
- Garnish and serve: Sprinkle fresh cilantro on top, serve with lime wedges, and enjoy your spicy shrimp tacos!
Savory Lemon Herb Chicken Thighs

Looking for a simple yet delightful dish? Savory lemon herb chicken thighs are just the ticket! The bright flavor of lemon combined with aromatic herbs creates a dish that's both refreshing and satisfying. With juicy chicken thighs and a zesty marinade, this recipe is a perfect choice for any dinner table.
This recipe is easy to whip up, making it a great option for busy weeknights or laid-back weekends. The marinated chicken can be grilled or baked, ensuring a delicious meal with minimal effort. Get ready to enjoy a burst of flavors!
Ingredients
- 4 chicken thighs, bone-in and skin-on
- 2 tablespoons olive oil
- 2 cloves garlic, minced
- 1 lemon, juiced and zested
- 1 tablespoon fresh rosemary, chopped
- 1 tablespoon fresh thyme, chopped
- Salt and pepper to taste
Instructions
- Prepare the Marinade: In a bowl, mix olive oil, minced garlic, lemon juice, lemon zest, rosemary, thyme, salt, and pepper.
- Marinate the Chicken: Place the chicken thighs in a resealable bag or a dish, pour the marinade over them, and coat well. Let it marinate in the refrigerator for at least 30 minutes, or up to overnight for more flavor.
- Cook the Chicken: Preheat your grill or oven to 400°F (200°C). If grilling, cook the chicken for about 6-7 minutes on each side until fully cooked. If baking, place the thighs in a baking dish and bake for about 30-35 minutes until the internal temperature reaches 165°F (75°C).
- Serve: Let the chicken rest for a few minutes, then serve with lemon wedges and a sprinkle of fresh herbs on top.
Creamy Garlic Parmesan Pasta
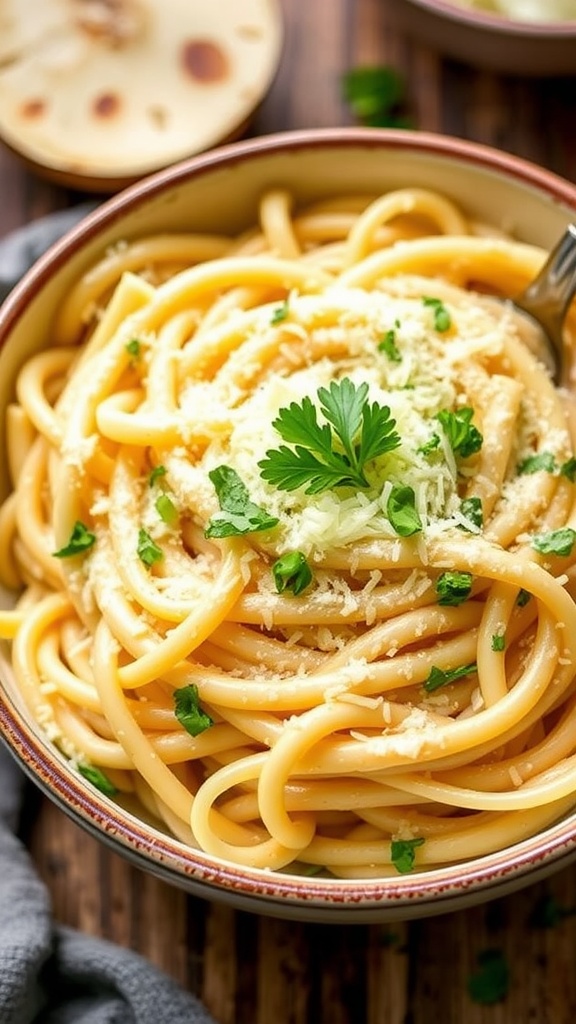
This creamy garlic parmesan pasta is a delightful dish that brings together rich flavors and comforting textures. It's simple to make, making it perfect for a quick weeknight dinner or a cozy weekend meal. The combination of garlic and parmesan creates a savory taste that is sure to please everyone at the table.
The best part? This recipe comes together in about 30 minutes, so you can enjoy a delicious homemade meal without spending hours in the kitchen. Pair it with a fresh salad or some crusty bread for an even more satisfying experience.
Ingredients
- 8 ounces spaghetti or your favorite pasta
- 2 tablespoons olive oil
- 4 cloves garlic, minced
- 1 cup heavy cream
- 1 cup grated parmesan cheese
- Salt and pepper to taste
- Fresh parsley, chopped (for garnish)
Instructions
- Cook the Pasta: In a large pot of boiling salted water, cook the pasta according to package instructions until al dente. Drain and set aside.
- Prepare the Sauce: In the same pot, heat the olive oil over medium heat. Add the minced garlic and sauté for about 1-2 minutes until fragrant, being careful not to burn it.
- Make it Creamy: Pour in the heavy cream and bring to a simmer. Gradually stir in the parmesan cheese until melted and smooth. Season with salt and pepper to taste.
- Combine: Add the cooked pasta to the sauce and toss until well coated. If the sauce is too thick, you can add a splash of pasta water to reach the desired consistency.
- Serve: Garnish with fresh parsley and additional parmesan cheese if desired. Enjoy your creamy garlic parmesan pasta warm!
Mediterranean Chickpea Salad
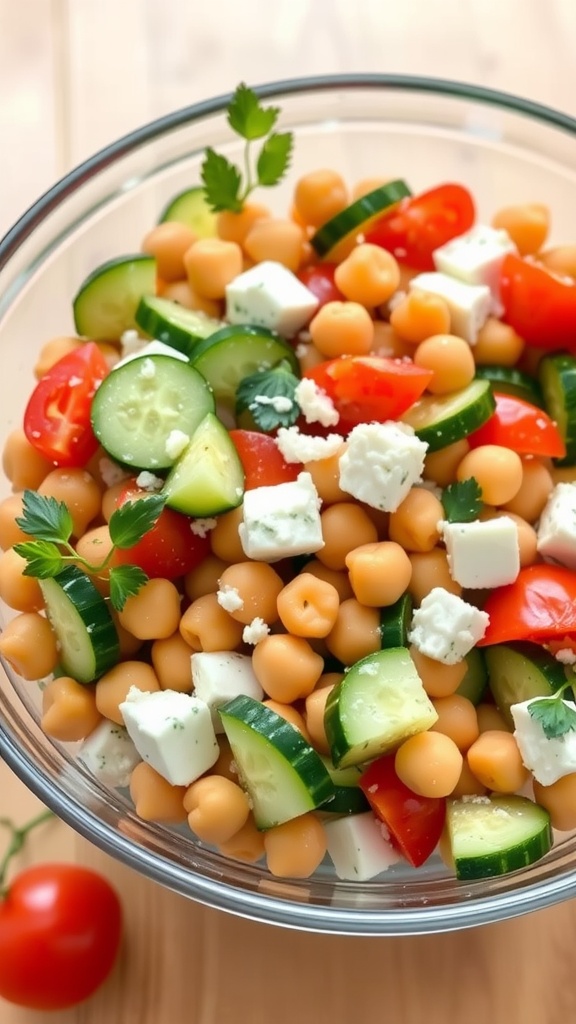
This Mediterranean Chickpea Salad is a bright and flavorful dish that's easy to whip up anytime you need a quick meal. It's packed with protein from the chickpeas and loaded with fresh vegetables like cucumbers and tomatoes. The tangy feta cheese adds a delightful creaminess, making every bite satisfying.
Not only is this salad simple to prepare, but it's also incredibly versatile. You can serve it as a light lunch, a side dish for dinner, or even as a snack. Fresh herbs like parsley or cilantro elevate the flavor profile, and a drizzle of olive oil ties everything together beautifully.
Ingredients
- 1 can (15 oz) chickpeas, drained and rinsed
- 1 cup cherry tomatoes, halved
- 1 cucumber, diced
- 1/2 cup feta cheese, crumbled
- 1/4 cup red onion, finely chopped
- 1/4 cup fresh parsley, chopped
- 3 tablespoons olive oil
- 2 tablespoons lemon juice
- Salt and pepper to taste
Instructions
- Combine Ingredients: In a large bowl, mix together the chickpeas, cherry tomatoes, cucumber, feta cheese, red onion, and parsley.
- Make the Dressing: In a small bowl, whisk together olive oil, lemon juice, salt, and pepper.
- Toss Everything Together: Drizzle the dressing over the salad and gently toss to combine all the ingredients evenly.
- Serve: Enjoy immediately, or let it chill in the fridge for about 30 minutes to enhance the flavors.
Chicken Fajitas with Bell Peppers
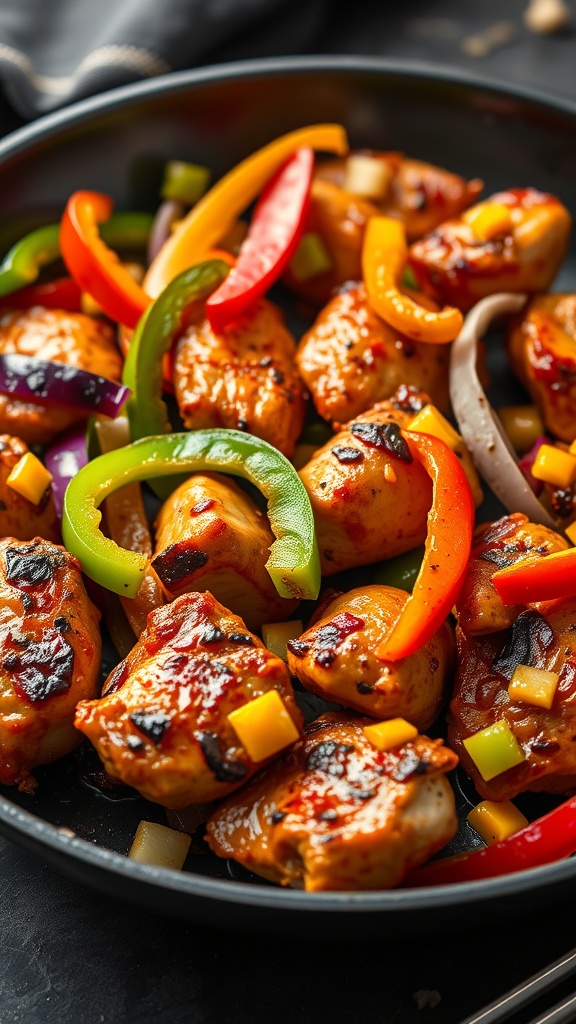
Chicken fajitas with bell peppers are a delightful choice for dinner, bringing vibrant flavors and a satisfying crunch to your plate. This dish is a perfect blend of tender chicken, smoky spices, and colorful vegetables, making it not only tasty but visually appealing as well.
Simple to make, chicken fajitas come together quickly and are great for busy nights. With minimal prep and cooking time, you'll have a flavorful meal that everyone can enjoy. Serve these sizzling fajitas with warm tortillas for a fun and interactive dining experience!
Ingredients
- 1 pound chicken breasts, sliced
- 1 tablespoon olive oil
- 1 teaspoon chili powder
- 1 teaspoon cumin
- 1/2 teaspoon garlic powder
- Salt and pepper to taste
- 1 bell pepper (any color), sliced
- 1 onion, sliced
- Tortillas for serving
- Optional toppings: salsa, guacamole, sour cream
Instructions
- Marinate the Chicken: In a bowl, combine sliced chicken, olive oil, chili powder, cumin, garlic powder, salt, and pepper. Mix well and let it sit for 15-20 minutes.
- Cook the Chicken: Heat a skillet over medium-high heat. Add the marinated chicken and cook for about 5-7 minutes, or until fully cooked and browned.
- Add Vegetables: Toss in the sliced bell pepper and onion. Cook for an additional 3-5 minutes until the vegetables are tender and slightly charred.
- Serve: Warm the tortillas in a separate skillet or microwave. Fill each tortilla with the chicken and vegetable mixture. Top with your choice of salsa, guacamole, or sour cream and enjoy!
Honey Garlic Glazed Carrots

Honey Garlic Glazed Carrots are a delightful side dish that perfectly balances sweet and savory flavors. The natural sweetness of the carrots is enhanced with a simple honey and garlic glaze, making them irresistible. This recipe is not only quick and easy to prepare but also adds a vibrant pop of color to your dinner table.
Whether you're looking to impress guests or simply want a tasty addition to your weeknight meals, these glazed carrots are sure to please. They pair wonderfully with various main dishes and are a hit with both kids and adults alike.
Ingredients
- 1 pound fresh carrots, peeled and cut into sticks
- 2 tablespoons olive oil
- 2 tablespoons honey
- 2 cloves garlic, minced
- Salt and pepper to taste
- Chopped parsley for garnish (optional)
Instructions
- Prep the Carrots: Preheat your oven to 400°F (200°C). Place the carrot sticks in a large bowl.
- Make the Glaze: In a small bowl, whisk together the olive oil, honey, minced garlic, salt, and pepper.
- Coat the Carrots: Pour the honey garlic mixture over the carrots and toss until they are evenly coated.
- Roast the Carrots: Spread the carrots in a single layer on a baking sheet. Roast for about 25-30 minutes, or until tender and caramelized, stirring halfway through.
- Serve: Once cooked, remove from the oven and garnish with chopped parsley if desired. Serve warm.
Teriyaki Glazed Grilled Pork Chops
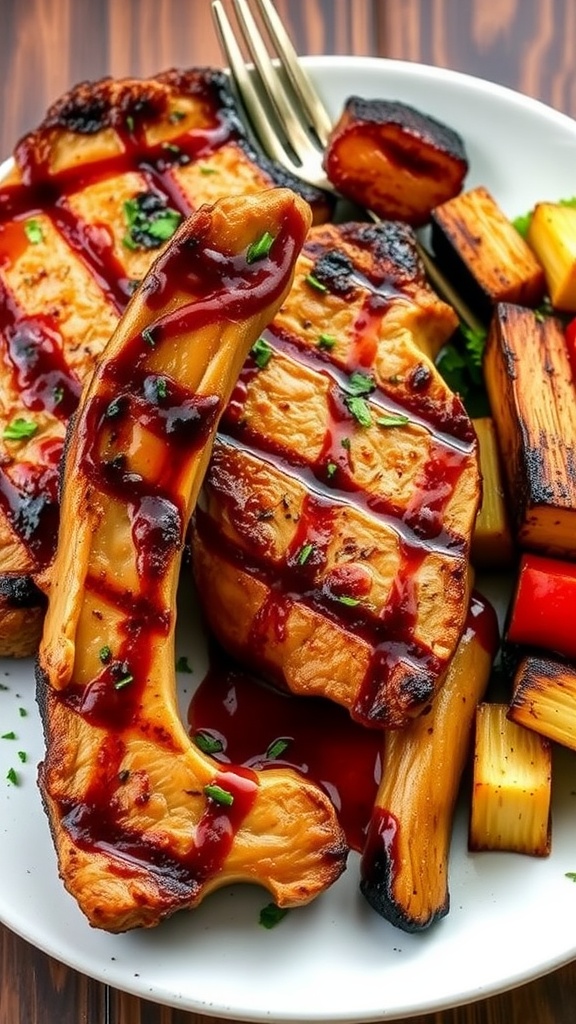
Teriyaki glazed grilled pork chops bring a delightful mix of sweet and savory flavors to your dinner table. The teriyaki sauce caramelizes beautifully on the meat, creating an appetizing glaze that enhances the natural flavors of the pork. This recipe is not only tasty but also simple to prepare, making it a perfect choice for a weeknight meal or a weekend gathering with friends.
With just a few ingredients and quick cooking time, you can enjoy perfectly grilled pork chops that are juicy and full of flavor. Pair them with your favorite sides to create a satisfying meal that everyone will love.
Ingredients
- 4 pork chops (about 1-inch thick)
- 1/2 cup teriyaki sauce
- 2 tablespoons olive oil
- 2 cloves garlic, minced
- 1 teaspoon ginger, grated
- Salt and pepper to taste
- Chopped green onions for garnish
Instructions
- Prepare the Marinade: In a bowl, mix together teriyaki sauce, olive oil, minced garlic, and grated ginger. Season with salt and pepper.
- Marinate the Pork: Place the pork chops in a resealable bag or shallow dish, then pour the marinade over them. Seal the bag or cover the dish and let it marinate in the refrigerator for at least 30 minutes, or up to 2 hours for more flavor.
- Preheat the Grill: Heat your grill to medium-high heat. Make sure it is well-oiled to prevent sticking.
- Grill the Pork Chops: Remove the pork chops from the marinade, letting any excess drip off. Place them on the grill and cook for about 5-7 minutes on each side or until the internal temperature reaches 145°F (63°C).
- Serve: Once cooked, remove the pork chops from the grill and let them rest for a few minutes. Garnish with chopped green onions before serving.
Vegetarian Mushroom Risotto
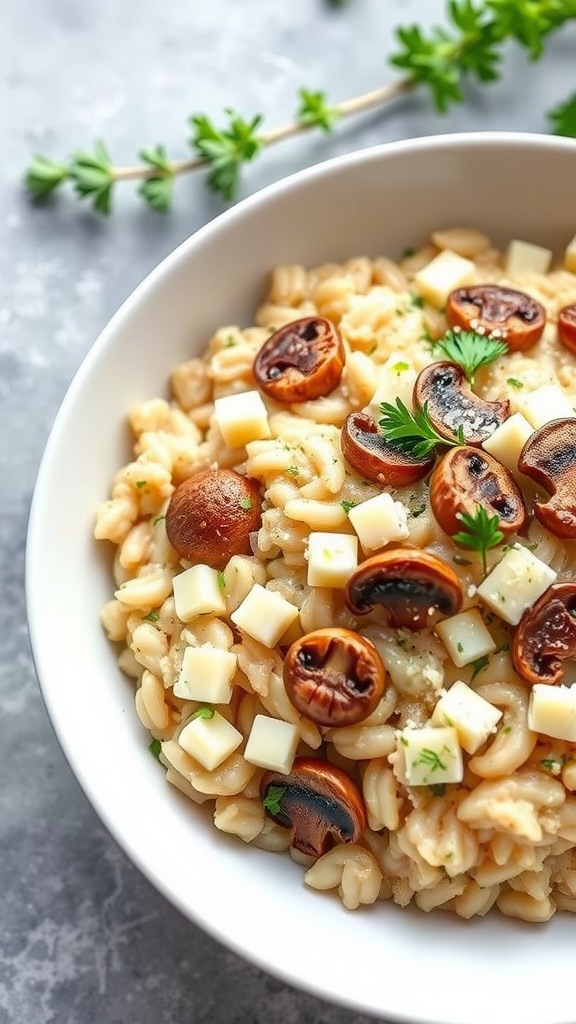
Vegetarian Mushroom Risotto is a creamy, comforting dish that's perfect for any dinner. The combination of earthy mushrooms and rich, creamy rice creates a delightful flavor experience. This recipe is not only tasty but also straightforward, making it ideal for both novice cooks and experienced chefs.
The slow cooking of Arborio rice allows for a creamy texture while the mushrooms add depth and umami. This dish is versatile, so feel free to add your favorite vegetables or herbs. It’s a great way to enjoy a satisfying meal any night of the week!
Ingredients
- 1 cup Arborio rice
- 4 cups vegetable broth
- 1 cup mushrooms, sliced
- 1 small onion, finely chopped
- 2 cloves garlic, minced
- 1/2 cup white wine (optional)
- 1/2 cup grated Parmesan cheese (or vegan alternative)
- 2 tablespoons olive oil
- Salt and pepper to taste
- Fresh parsley, chopped for garnish
Instructions
- Prepare the Broth: In a saucepan, keep the vegetable broth warm over low heat.
- Sauté the Aromatics: In a large pan, heat olive oil over medium heat. Add the chopped onion and garlic, cooking until softened.
- Add the Mushrooms: Stir in the sliced mushrooms and cook until they release their moisture and become tender.
- Cook the Rice: Add the Arborio rice to the pan, stirring for 1-2 minutes until the rice is well-coated with oil.
- Add Wine: If using, pour in the white wine and let it simmer until mostly absorbed.
- Add Broth Gradually: Begin adding the warm vegetable broth, one ladle at a time, stirring frequently. Allow each addition to be absorbed before adding the next.
- Finish with Cheese: Once the rice is creamy and al dente, stir in the grated Parmesan cheese. Season with salt and pepper to taste.
- Garnish and Serve: Serve the risotto warm, garnished with fresh parsley.
Zucchini Noodles with Pesto and Cherry Tomatoes
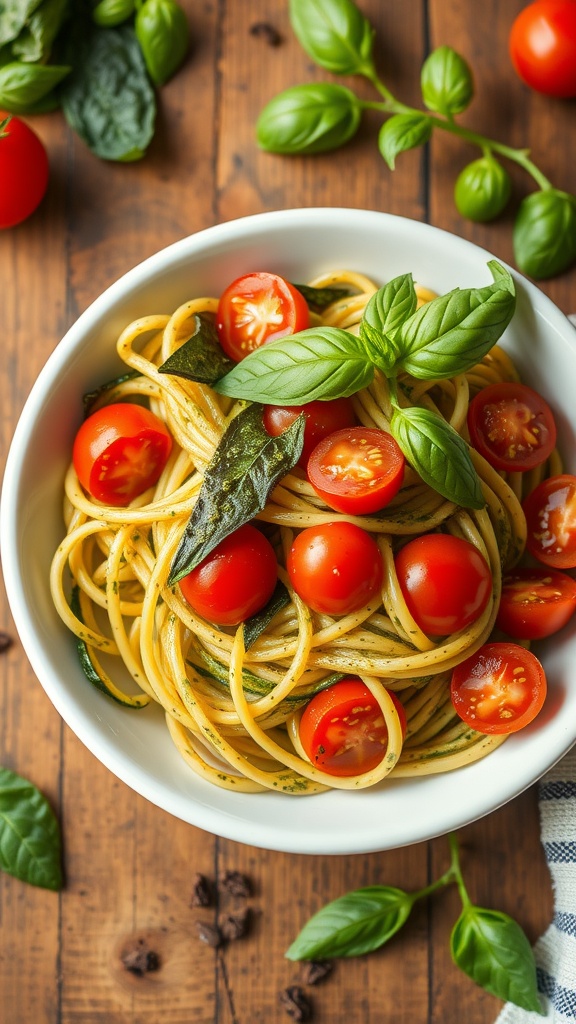
Zucchini noodles with pesto and cherry tomatoes offer a light and refreshing meal option that’s both satisfying and easy to make. The combination of the fresh basil pesto and juicy cherry tomatoes creates a burst of flavor that makes this dish delightful. Plus, it’s a great way to incorporate more vegetables into your diet without sacrificing taste.
This dish is perfect for a quick weeknight dinner or a leisurely weekend lunch. It takes minimal time to prepare, making it ideal for busy days when you want something nutritious without a lot of fuss. With just a few ingredients, you can whip up this flavorful meal in no time!
Ingredients
- 4 medium zucchinis
- 1 cup cherry tomatoes, halved
- 1/2 cup fresh basil pesto
- 2 tablespoons olive oil
- Salt and pepper to taste
- Fresh basil leaves for garnish
Instructions
- Prepare the Zucchini: Using a spiralizer or vegetable peeler, create zucchini noodles. Set aside.
- Cook the Zucchini: In a large skillet, heat olive oil over medium heat. Add the zucchini noodles and sauté for about 3-4 minutes until just tender.
- Add the Pesto: Stir in the pesto and mix until the noodles are well coated. Cook for an additional 2 minutes.
- Incorporate Cherry Tomatoes: Add the halved cherry tomatoes, season with salt and pepper, and cook for another minute until the tomatoes are warmed through.
- Serve: Plate the zucchini noodles and top with fresh basil leaves for garnish. Enjoy your meal!
Savory Baked Eggplant Parmesan
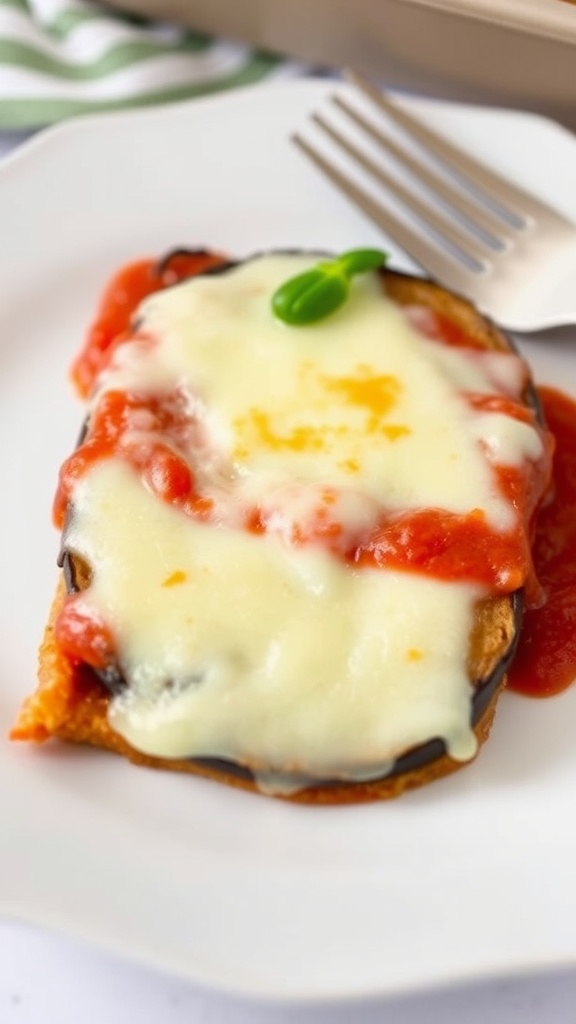
Looking for a comforting dish that’s both satisfying and easy to prepare? Savory Baked Eggplant Parmesan is a delicious option that features layers of tender eggplant, rich marinara sauce, and gooey cheese. This dish is perfect for any night of the week, whether you’re feeding the family or having friends over for dinner.
The combination of flavors creates a delightful balance that is sure to please everyone at the table. Plus, it’s simple enough to whip up even on a busy evening. Let’s dive into the recipe!
Ingredients
- 2 medium eggplants, sliced into 1/2-inch rounds
- Salt, for sweating the eggplant
- 2 cups marinara sauce
- 2 cups shredded mozzarella cheese
- 1/2 cup grated Parmesan cheese
- 1 teaspoon dried oregano
- 1 teaspoon garlic powder
- 1/4 teaspoon black pepper
- Olive oil, for drizzling
- Fresh basil, for garnish (optional)
Instructions
- Prep the Eggplant: Sprinkle the eggplant slices with salt and let them sit for about 30 minutes to draw out moisture. Rinse and pat them dry with a paper towel.
- Preheat the Oven: Preheat your oven to 375°F (190°C).
- Layer the Ingredients: In a baking dish, spread a thin layer of marinara sauce. Layer half of the eggplant slices, half of the marinara sauce, and half of the mozzarella. Repeat the layers, finishing with the remaining mozzarella and Parmesan cheese on top.
- Season: Sprinkle oregano, garlic powder, and black pepper over the top. Drizzle with olive oil.
- Bake: Cover the dish with foil and bake for 30 minutes. Then, remove the foil and bake for an additional 15-20 minutes, or until the cheese is bubbly and golden.
- Serve: Let it cool slightly before garnishing with fresh basil if desired. Enjoy warm!
Creamy Spinach and Artichoke Dip with Bread

Creamy spinach and artichoke dip is a delightful blend of textures and flavors that makes for a comforting appetizer or snack. With its rich, cheesy goodness and hints of garlic, this dip is both savory and satisfying. Paired with crispy bread, it creates a delicious combination that is perfect for gatherings or cozy nights in.
This recipe is straightforward and can be whipped up in no time, making it an ideal choice for both novice and experienced cooks. You'll love the way the creamy base complements the earthy spinach and tangy artichokes, resulting in a dip that's hard to resist. Grab your favorite bread, and let’s dive into this tasty treat!
Ingredients
- 1 cup cream cheese, softened
- 1/2 cup sour cream
- 1/2 cup mayonnaise
- 1 cup shredded mozzarella cheese
- 1 cup chopped spinach (fresh or frozen, thawed and drained)
- 1 cup artichoke hearts, chopped
- 2 cloves garlic, minced
- 1/2 teaspoon red pepper flakes (optional)
- Salt and pepper to taste
- Bread slices for serving
Instructions
- Preheat your oven to 350°F (175°C).
- In a large mixing bowl, combine the cream cheese, sour cream, and mayonnaise until smooth.
- Add in the shredded mozzarella, chopped spinach, artichoke hearts, minced garlic, and red pepper flakes (if using). Mix well until all ingredients are fully incorporated.
- Season with salt and pepper to taste. Transfer the mixture to a baking dish.
- Bake for about 25-30 minutes, or until the dip is hot and bubbly on top.
- Serve warm with slices of bread for dipping. Enjoy your creamy spinach and artichoke dip!
Roasted Red Pepper and Tomato Soup

This roasted red pepper and tomato soup is a delightful blend of flavors that warms the heart and soul. The sweetness of the roasted peppers complements the tangy tomatoes, resulting in a deliciously creamy texture. It’s a simple dish to prepare, making it perfect for a cozy dinner or a quick lunch.
Rich in flavor yet easy to make, this soup can be whipped up in no time. Serve it with a slice of crusty bread for a satisfying meal. Let’s dive into the recipe!
Ingredients
- 4 large red bell peppers
- 6 ripe tomatoes, quartered
- 1 medium onion, chopped
- 3 cloves garlic, minced
- 4 cups vegetable broth
- 1 teaspoon dried basil
- Salt and pepper to taste
- Olive oil for roasting
- Fresh basil leaves for garnish
- 1/2 cup heavy cream (optional)
Instructions
- Preheat the oven to 400°F (200°C). Cut the red peppers in half, remove the seeds, and place them on a baking sheet. Drizzle with olive oil and roast for 25-30 minutes until charred.
- In a large pot, heat a tablespoon of olive oil over medium heat. Add the chopped onion and garlic, sautéing until soft and fragrant.
- Add the roasted red peppers, quartered tomatoes, vegetable broth, and dried basil to the pot. Bring to a boil, then reduce the heat and simmer for about 20 minutes.
- Using an immersion blender, puree the soup until smooth. Alternatively, you can transfer it to a blender in batches. Stir in heavy cream if desired, and season with salt and pepper to taste.
- Serve warm, garnished with fresh basil leaves.
Grilled Lemon Dill Shrimp Skewers
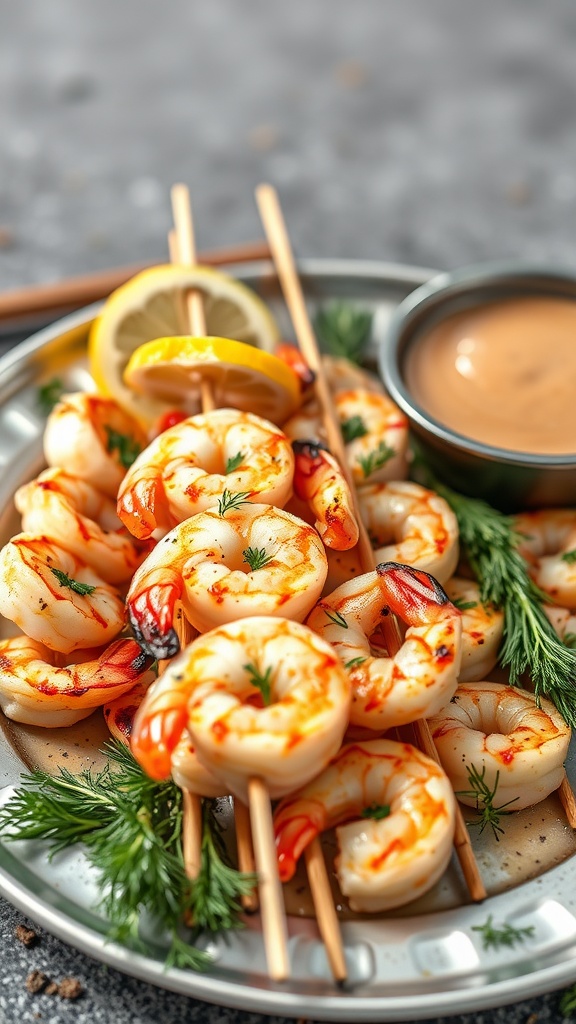
Grilled Lemon Dill Shrimp Skewers are a delightful option for dinner that combines fresh flavors and a light, summery feel. The tangy lemon paired with aromatic dill creates a refreshing marinade that brings out the natural sweetness of the shrimp. This dish is not only tasty but also incredibly simple to prepare, making it perfect for a weeknight meal or a weekend gathering.
Serving these skewers at your table adds an elegant touch without requiring hours in the kitchen. You can easily customize the recipe with your favorite vegetables on the skewers, making it versatile for everyone’s taste. Enjoy them with a dipping sauce or alongside a crisp salad for a complete meal!
Ingredients
- 1 pound large shrimp, peeled and deveined
- 1/4 cup olive oil
- 2 tablespoons fresh lemon juice
- 1 teaspoon lemon zest
- 2 tablespoons fresh dill, chopped
- 2 cloves garlic, minced
- Salt and pepper to taste
- Wooden skewers (soaked in water for 30 minutes)
Instructions
- Prepare the Marinade: In a bowl, whisk together olive oil, lemon juice, lemon zest, dill, garlic, salt, and pepper.
- Marinate the Shrimp: Add the shrimp to the marinade and let it sit for about 15-30 minutes, allowing the flavors to infuse.
- Preheat the Grill: Heat your grill to medium-high. If using a grill pan, preheat it over medium heat.
- Skewer the Shrimp: Thread the marinated shrimp onto the soaked wooden skewers. Make sure to leave a little space between each shrimp for even cooking.
- Grill the Skewers: Place the skewers on the grill and cook for 2-3 minutes on each side, or until the shrimp are pink and opaque.
- Serve: Remove from the grill and serve immediately with your choice of dipping sauce or alongside a fresh salad.
Coconut Curry Chickpeas with Jasmine Rice

Coconut curry chickpeas are a delightful blend of creamy coconut milk, aromatic spices, and hearty chickpeas. This dish offers a rich flavor that perfectly balances sweetness and spice, making it both comforting and satisfying. Plus, it’s surprisingly simple to whip up, making it a great choice for a weeknight dinner.
Paired with fluffy jasmine rice, this meal is not only filling but also visually appealing. The combination of the vibrant curry and the soft rice creates a beautiful plate that’s sure to please. You can easily adjust the spice levels according to your taste, making it a versatile recipe for everyone.
Ingredients
- 1 can (15 oz) chickpeas, drained and rinsed
- 1 tablespoon coconut oil
- 1 onion, diced
- 2 cloves garlic, minced
- 1 tablespoon fresh ginger, grated
- 1 tablespoon curry powder
- 1 can (13.5 oz) coconut milk
- 1 cup vegetable broth
- 1 tablespoon soy sauce
- 1 teaspoon lime juice
- Salt, to taste
- Fresh cilantro, for garnish
- 1 cup jasmine rice
Instructions
- Cook the Rice: In a pot, combine jasmine rice with 2 cups of water. Bring to a boil, then reduce heat to low, cover, and simmer for about 15 minutes until the rice is tender and water is absorbed. Fluff with a fork and set aside.
- Sauté the Vegetables: In a large skillet, heat coconut oil over medium heat. Add diced onion and cook until soft, about 5 minutes. Stir in garlic and ginger, cooking for another minute.
- Add Spices and Chickpeas: Sprinkle in curry powder and cook for another 30 seconds. Add in the chickpeas, coconut milk, vegetable broth, and soy sauce. Stir everything together and bring to a simmer.
- Simmer the Curry: Let the curry simmer for about 10 minutes, allowing the flavors to meld. Adjust seasoning with salt and lime juice to taste.
- Serve: Spoon the coconut curry chickpeas over a bed of jasmine rice. Garnish with fresh cilantro and enjoy!
Lentil Soup with Spinach and Carrots
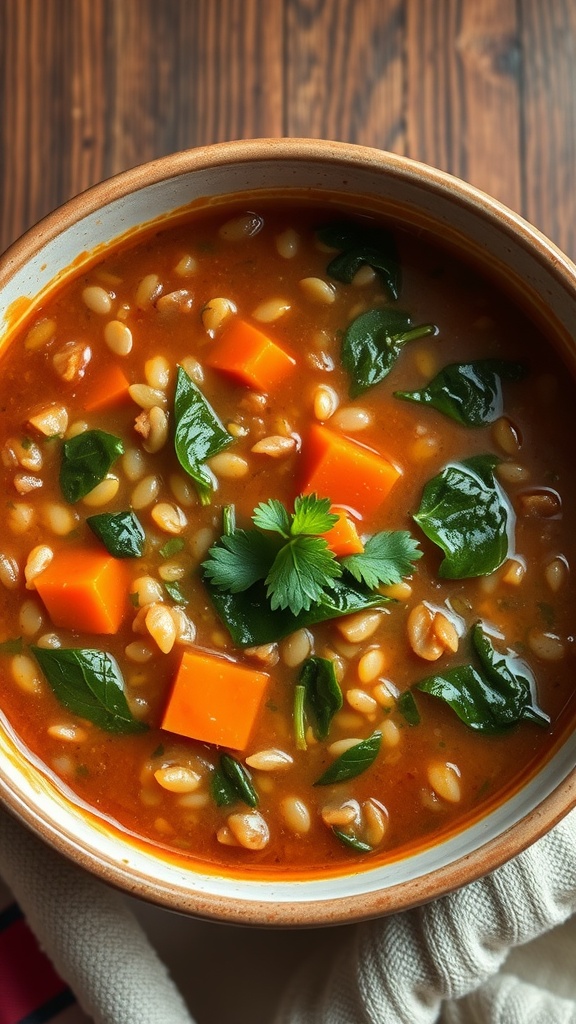
This lentil soup with spinach and carrots is a delightful combination of flavors and textures. The earthy lentils provide a hearty base, while the sweetness of the carrots and the freshness of the spinach add depth to the dish. It's a simple recipe that comes together quickly, making it perfect for a cozy dinner or a meal prep option for the week ahead.
Not only is this soup nutritious, but it’s also incredibly satisfying. Each spoonful is packed with protein, fiber, and a variety of vitamins, making it a wholesome choice for any night. Plus, it’s easy to customize with your favorite spices or additional vegetables if you like. Give this recipe a try, and you’ll have a warming meal that’s both healthy and delicious!
Ingredients
- 1 cup dried lentils, rinsed
- 1 medium onion, chopped
- 2 carrots, diced
- 2 cloves garlic, minced
- 4 cups vegetable broth
- 2 cups fresh spinach, chopped
- 1 can diced tomatoes (14.5 oz)
- 1 teaspoon ground cumin
- 1 teaspoon smoked paprika
- Salt and pepper, to taste
- 2 tablespoons olive oil
Instructions
- Heat the olive oil in a large pot over medium heat. Add the chopped onion and carrots, and sauté for about 5 minutes until softened.
- Stir in the garlic and cook for another minute until fragrant.
- Add the rinsed lentils, diced tomatoes, vegetable broth, cumin, and smoked paprika. Stir well and bring to a boil.
- Reduce the heat to low, cover, and let simmer for 25-30 minutes, or until the lentils are tender.
- Stir in the chopped spinach and cook for an additional 5 minutes. Season with salt and pepper to taste. Serve hot and enjoy!
Pesto Chicken and Sun-Dried Tomato Pasta
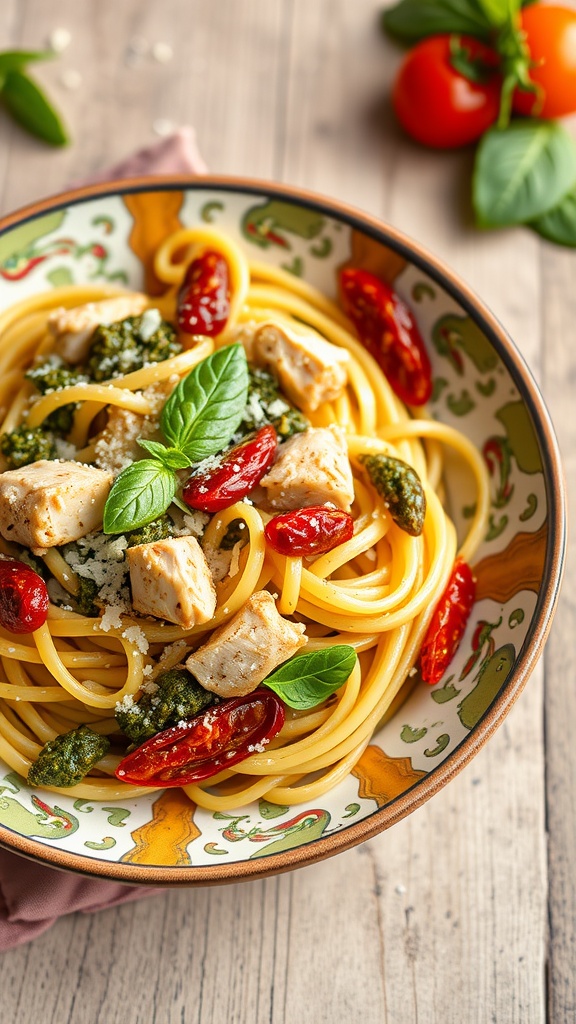
Pesto Chicken and Sun-Dried Tomato Pasta combines the rich flavors of basil pesto with juicy chicken and tangy sun-dried tomatoes for a delightful meal. This dish is not only tasty but also easy to whip up, making it perfect for a weeknight dinner. With just a few ingredients, you can create something that feels special without spending hours in the kitchen.
The creamy texture of the pesto pairs beautifully with the succulent chicken, while the sun-dried tomatoes add a pop of sweetness. This pasta dish is vibrant and comforting, making it a hit with both family and friends. Plus, it’s versatile—feel free to toss in your favorite vegetables to customize it to your liking!
Ingredients
- 8 ounces of your favorite pasta
- 2 chicken breasts, diced
- 1/2 cup basil pesto
- 1/2 cup sun-dried tomatoes, chopped
- 1 tablespoon olive oil
- Salt and pepper to taste
- Fresh basil leaves for garnish
Instructions
- Cook the Pasta: Bring a large pot of salted water to a boil. Add the pasta and cook according to package instructions until al dente. Drain and set aside.
- Prepare the Chicken: In a large skillet, heat the olive oil over medium heat. Add the diced chicken, seasoning with salt and pepper. Cook until browned and cooked through, about 6-8 minutes.
- Add the Pesto and Tomatoes: Once the chicken is cooked, lower the heat and stir in the basil pesto and sun-dried tomatoes. Mix well until everything is combined and heated through.
- Combine with Pasta: Add the drained pasta to the skillet, tossing to combine all the ingredients evenly.
- Serve: Plate the pasta and garnish with fresh basil leaves. Enjoy!
Cauliflower Rice Stir-fry with Eggs

Cauliflower Rice Stir-fry with Eggs is a delightful dish that brings together the nutty flavor of cauliflower rice and the heartiness of scrambled eggs. This recipe is not only easy to make but also flexible, allowing you to toss in any veggies you have on hand. It’s a fantastic way to enjoy a nutritious meal without sacrificing taste.
This stir-fry is colorful and vibrant, featuring fresh vegetables that add a crunch and a burst of flavor. Whether it's a quick weeknight dinner or a leisurely weekend meal, this dish will satisfy your cravings while keeping things light and healthy.
Ingredients
- 4 cups cauliflower rice
- 2 tablespoons vegetable oil
- 1 cup bell peppers, chopped
- 1 cup carrots, julienned
- 1 cup green onions, chopped
- 2 large eggs
- 2 tablespoons soy sauce
- 1 teaspoon sesame oil
- Salt and pepper to taste
Instructions
- Heat the vegetable oil in a large skillet over medium heat. Add the bell peppers and carrots, and stir-fry for about 3-4 minutes until they start to soften.
- Add the cauliflower rice to the skillet and continue to stir-fry for another 5 minutes until it’s tender but still has some crunch.
- Push the vegetables to one side of the skillet and crack the eggs into the empty space. Scramble them gently until cooked through, then mix with the vegetables.
- Pour in the soy sauce and sesame oil, stirring well to combine all the ingredients. Season with salt and pepper to taste.
- Finally, add the green onions and toss everything together for an additional minute before serving.
Oven-Baked BBQ Chicken Drumsticks

Oven-baked BBQ chicken drumsticks are a delicious and easy way to enjoy a classic dish at home. The tender meat soaks up the rich, smoky flavors of barbecue sauce, making each bite a treat. Plus, baking them in the oven ensures they're juicy and well-cooked without the hassle of grilling.
This recipe is simple enough for a weeknight dinner yet tasty enough for gatherings. Serve these drumsticks with your favorite sides, and you’ll have a satisfying meal that everyone will love.
Ingredients
- 10 chicken drumsticks
- 1 cup barbecue sauce
- 1 tablespoon olive oil
- 1 teaspoon garlic powder
- 1 teaspoon onion powder
- 1/2 teaspoon smoked paprika
- Salt and pepper to taste
Instructions
- Preheat your oven to 400°F (200°C).
- In a large bowl, mix the olive oil, garlic powder, onion powder, smoked paprika, salt, and pepper.
- Add the chicken drumsticks to the bowl and toss them until they are well-coated in the spice mixture.
- Place the drumsticks on a baking sheet lined with parchment paper.
- Bake for 25 minutes, then remove from the oven and brush generous amounts of barbecue sauce over each drumstick.
- Return to the oven and bake for an additional 15-20 minutes, or until the chicken is fully cooked and the sauce is caramelized.
- Let them rest for a few minutes before serving. Enjoy!
Crispy Baked Sweet Potato Fries

If you're looking for a delicious and healthy side dish, crispy baked sweet potato fries are a fantastic choice. They have a natural sweetness and a satisfying crunch that make them a perfect addition to any meal. Plus, they're simple to prepare, making them a great option for busy weeknights.
These fries are not only easy to make but also versatile. You can enjoy them on their own, dip them in your favorite sauce, or serve them alongside burgers or grilled chicken. Let's dive into the recipe!
Ingredients
- 2 large sweet potatoes
- 2 tablespoons olive oil
- 1 teaspoon paprika
- 1 teaspoon garlic powder
- 1/2 teaspoon salt
- 1/4 teaspoon black pepper
- 1/4 teaspoon cayenne pepper (optional)
Instructions
- Preheat your oven to 425°F (220°C). Line a baking sheet with parchment paper for easy cleanup.
- Peel the sweet potatoes and cut them into thin fries, about 1/4 inch thick.
- In a large bowl, combine the sweet potato fries with olive oil, paprika, garlic powder, salt, black pepper, and cayenne pepper. Toss until the fries are evenly coated.
- Spread the fries in a single layer on the prepared baking sheet, making sure they are not overcrowded.
- Bake for 20-25 minutes, flipping halfway through, until they are golden and crispy.
- Remove from the oven and let them cool for a few minutes before serving.
Baked Falafel with Tahini Sauce

Baked falafel is a delicious and healthy alternative to the classic fried version. These crispy little bites are packed with flavor from herbs and spices, making them a perfect addition to any meal. Paired with a creamy tahini sauce, they’re not only tasty but also simple to prepare, making them a go-to for busy weeknights.
The texture of baked falafel is wonderfully crunchy on the outside while remaining tender on the inside. It’s a satisfying dish that can easily be served in a wrap, on a salad, or on its own as a snack. Whether you’re making it for yourself or entertaining friends, this recipe never disappoints!
Ingredients
- 1 can chickpeas, drained and rinsed
- 1 small onion, chopped
- 2 cloves garlic, minced
- 1/4 cup fresh parsley, chopped
- 1/4 cup fresh cilantro, chopped
- 1 teaspoon ground cumin
- 1 teaspoon ground coriander
- 1/2 teaspoon salt
- 1/4 teaspoon black pepper
- 1 tablespoon olive oil
- 1 tablespoon lemon juice
- 1/2 cup breadcrumbs
Instructions
- Preheat the oven to 400°F (200°C) and line a baking sheet with parchment paper.
- In a food processor, combine chickpeas, onion, garlic, parsley, cilantro, cumin, coriander, salt, and pepper. Pulse until the mixture is well combined but still slightly chunky.
- Transfer the mixture to a bowl and stir in olive oil, lemon juice, and breadcrumbs until everything is well mixed.
- Form the mixture into small balls and place them on the prepared baking sheet. Lightly spray or brush the falafel with oil.
- Bake for 25-30 minutes, flipping halfway through, until golden brown and crispy.
Classic Chicken Caesar Salad

This Classic Chicken Caesar Salad is a delightful combination of flavors and textures. The tender grilled chicken pairs perfectly with crisp romaine lettuce, crunchy croutons, and a creamy Caesar dressing. It's a satisfying dish that brings together savory and fresh ingredients, making it a popular choice for lunch or dinner.
Making this salad is simple! You can whip it up in no time, and it's easily customizable to suit your taste. Whether you're looking for a light meal or a side dish, this recipe will hit the spot.
Ingredients
- 2 cups romaine lettuce, chopped
- 1 cup grilled chicken, sliced
- 1 cup croutons
- 1/4 cup grated Parmesan cheese
- 1/2 cup Caesar dressing
Instructions
- Prepare the Salad Base: In a large bowl, add the chopped romaine lettuce.
- Add Chicken: Layer the sliced grilled chicken on top of the lettuce.
- Top with Croutons: Sprinkle the croutons evenly over the chicken and lettuce.
- Add Dressing: Drizzle the Caesar dressing over the salad and toss gently to combine.
- Finish with Cheese: Sprinkle grated Parmesan cheese on top. Season with salt and pepper to taste before serving.
Comments
Post a Comment