- Get link
- X
- Other Apps
24 Ultimate Game Day Finger Foods Everyone Will Love
Game day finger foods are the secret weapon for any sports gathering—finger-licking treats that keep everyone munching while cheering for their favorite team. From crispy wings to cheesy nachos, these bite-sized delights are perfect for snacking, sharing, and enjoying the excitement of the game without missing a moment of action. Get ready to elevate your game day experience with delicious bites that score big!
Cheesy Jalapeño Popper Stuffed Mushrooms
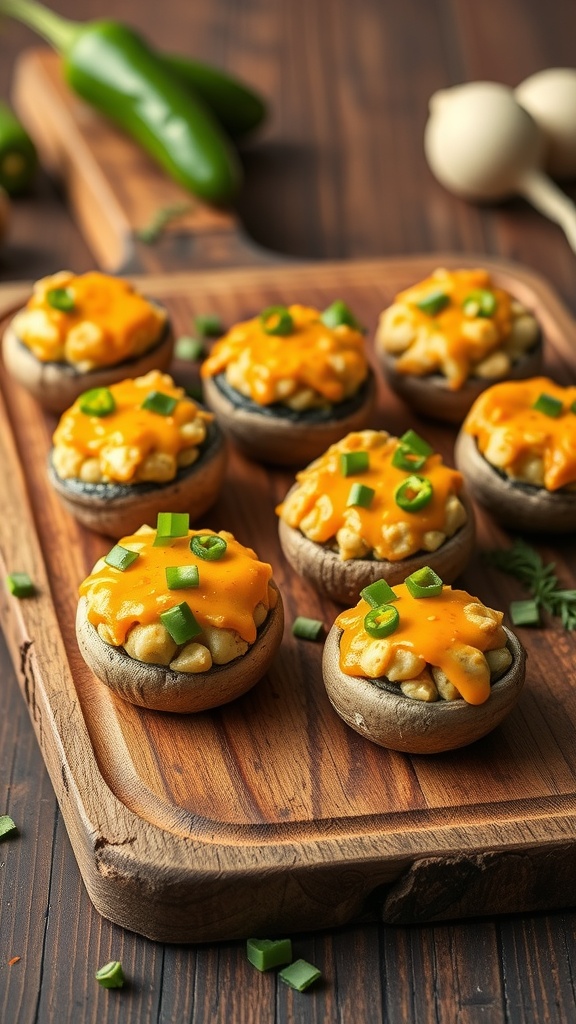
Cheesy Jalapeño Popper Stuffed Mushrooms are the perfect finger food for game day. They offer a delightful blend of creamy cheese and spicy jalapeños, all nestled in tender mushroom caps. The combination of flavors makes each bite irresistible, and they are simple to prepare, allowing you to enjoy the game without spending hours in the kitchen.
These stuffed mushrooms pack a punch with their cheesy goodness and a hint of heat from the jalapeños. They’re not just delicious; they’re also a fun way to mix up your usual game day snacks. Whether you're hosting a gathering or just enjoying a cozy night in, these bites are sure to be a hit!
Ingredients
- 12 large mushrooms, stems removed
- 1 cup cream cheese, softened
- 1/2 cup shredded cheddar cheese
- 1/4 cup diced jalapeños (fresh or pickled)
- 1/4 teaspoon garlic powder
- 1/4 teaspoon onion powder
- Salt and pepper to taste
- Chopped green onions for garnish
Instructions
- Preheat your oven to 375°F (190°C).
- In a mixing bowl, combine the cream cheese, cheddar cheese, diced jalapeños, garlic powder, onion powder, salt, and pepper. Mix until well combined.
- Stuff each mushroom cap generously with the cheese mixture and place them on a baking sheet.
- Bake for 20-25 minutes, or until the mushrooms are tender and the cheese is hot and bubbly.
- Remove from the oven and garnish with chopped green onions before serving warm.
Spicy Buffalo Cauliflower Bites
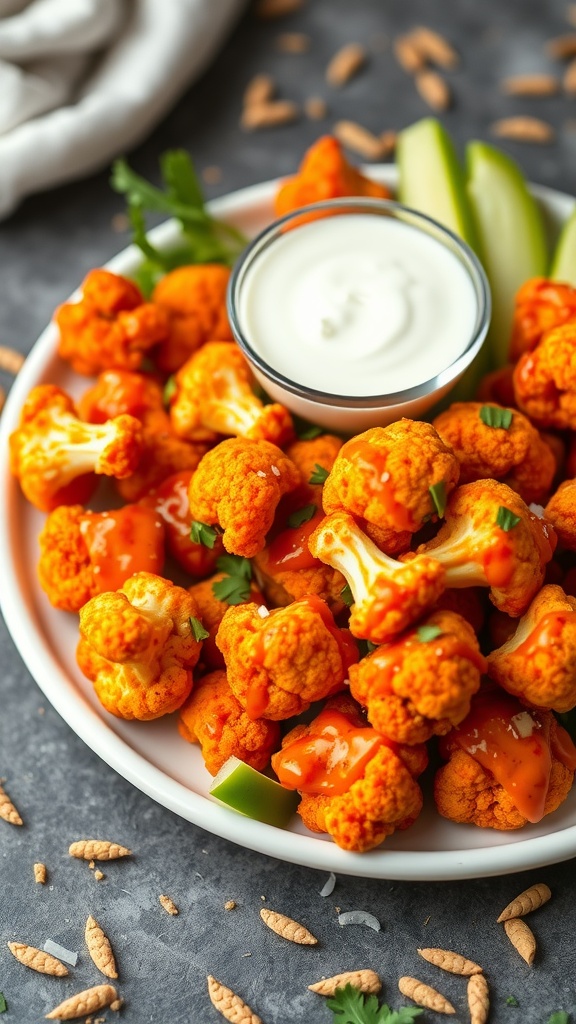
Spicy Buffalo Cauliflower Bites are a fantastic option for game day snacking. They pack a punch of flavor while being a healthier alternative to traditional buffalo wings. These bites are crispy on the outside and tender on the inside, coated in a spicy buffalo sauce that adds just the right kick.
Preparation is a breeze, making them perfect for any gathering. Whether you’re serving them as an appetizer or part of a spread, they are sure to be a hit. Pair them with a creamy ranch or blue cheese dip for a delicious contrast!
Ingredients
- 1 head of cauliflower, cut into bite-sized florets
- 1 cup all-purpose flour
- 1 teaspoon garlic powder
- 1 teaspoon onion powder
- 1 teaspoon paprika
- 1/2 teaspoon salt
- 1 cup water
- 1 cup buffalo sauce
- 2 tablespoons olive oil
- Fresh parsley, chopped (for garnish)
Instructions
- Preheat your oven to 450°F (230°C) and line a baking sheet with parchment paper.
- In a bowl, mix the flour, garlic powder, onion powder, paprika, and salt. Gradually add water until you have a smooth batter.
- Dip each cauliflower floret into the batter, allowing excess to drip off, and arrange them on the baking sheet.
- Bake for 20-25 minutes until golden and crispy, flipping them halfway through.
- In a separate bowl, combine the baked cauliflower with buffalo sauce and olive oil, tossing to coat evenly.
- Return the coated florets to the oven for an additional 10 minutes.
- Serve hot, garnished with fresh parsley and your favorite dipping sauce on the side.
Classic Chicken Wings in Various Sauces
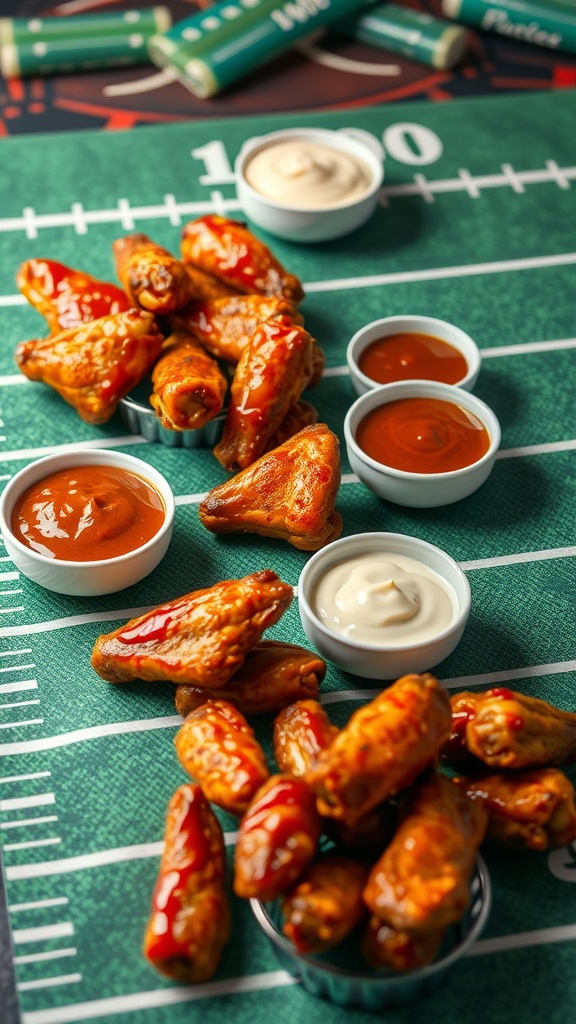
Chicken wings are a staple for game day, bringing both flavor and fun to any gathering. Their crispy skin and juicy meat make them irresistible, and the variety of sauces allows everyone to find their perfect match. Whether you prefer spicy buffalo, sweet barbecue, or tangy garlic parmesan, wings are simple to prepare and always a crowd-pleaser.
Making chicken wings is straightforward. A little prep, a bit of cooking, and you’ll have a platter ready for your friends and family. Pair them with some dipping sauces, and you’ve got the ultimate finger food for cheering on your favorite team!
Ingredients
- 2 pounds chicken wings
- 1 tablespoon olive oil
- 1 teaspoon garlic powder
- 1 teaspoon onion powder
- Salt and pepper to taste
- 1 cup buffalo sauce
- 1 cup barbecue sauce
- 1 cup ranch dressing
- 1 tablespoon honey (optional)
- 1/2 cup melted butter (for buffalo sauce)
Instructions
- Preheat your oven to 400°F (200°C). Line a baking sheet with aluminum foil and place a wire rack on top.
- In a large bowl, toss the chicken wings with olive oil, garlic powder, onion powder, salt, and pepper until evenly coated.
- Arrange the wings in a single layer on the rack and bake for 40-45 minutes, turning halfway through until crispy and golden brown.
- While the wings bake, prepare the buffalo sauce by combining melted butter and buffalo sauce in a bowl. For a sweeter version, stir in honey.
- Once the wings are done, toss them in the buffalo sauce or serve them with barbecue sauce and ranch dressing on the side.
- Serve hot with celery and carrot sticks for a perfect game day spread!
Savory Spinach and Artichoke Dip
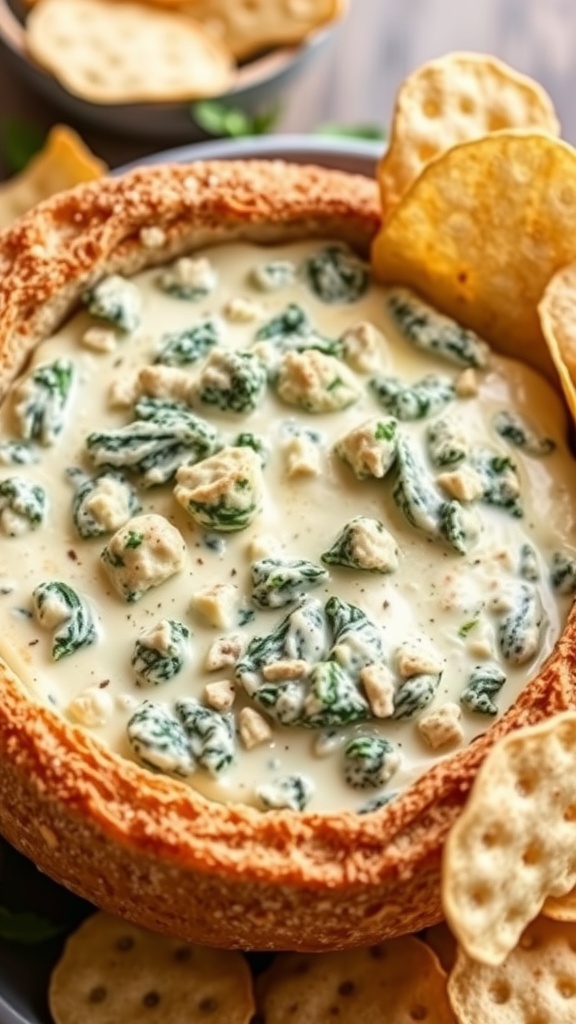
This Spinach and Artichoke Dip is a crowd-pleaser, perfect for game day gatherings. Creamy and cheesy, it offers a delightful balance of flavors that pairs wonderfully with crispy chips or bread. Plus, it’s simple to whip up, making it an ideal choice for both novice and experienced cooks.
With its rich texture and savory taste, this dip will surely have everyone coming back for more. Whether you're chilling with friends or hosting a big game day party, this dip is sure to score big!
Ingredients
- 1 cup frozen spinach, thawed and drained
- 1 cup canned artichoke hearts, chopped
- 1 cup cream cheese, softened
- 1 cup sour cream
- 1 cup shredded mozzarella cheese
- 1/2 cup grated Parmesan cheese
- 2 cloves garlic, minced
- 1 teaspoon salt
- 1/2 teaspoon black pepper
- 1/2 teaspoon red pepper flakes (optional)
Instructions
- Preheat your oven to 350°F (175°C).
- In a mixing bowl, combine the softened cream cheese, sour cream, mozzarella, and Parmesan cheese. Mix until well blended.
- Add the spinach, artichoke hearts, garlic, salt, pepper, and red pepper flakes. Stir until all ingredients are evenly incorporated.
- Transfer the mixture to a baking dish and spread it evenly.
- Bake in the preheated oven for 25-30 minutes, or until the top is golden and bubbly.
- Serve hot with chips, crackers, or slices of bread.
Mini BBQ Pulled Pork Sliders
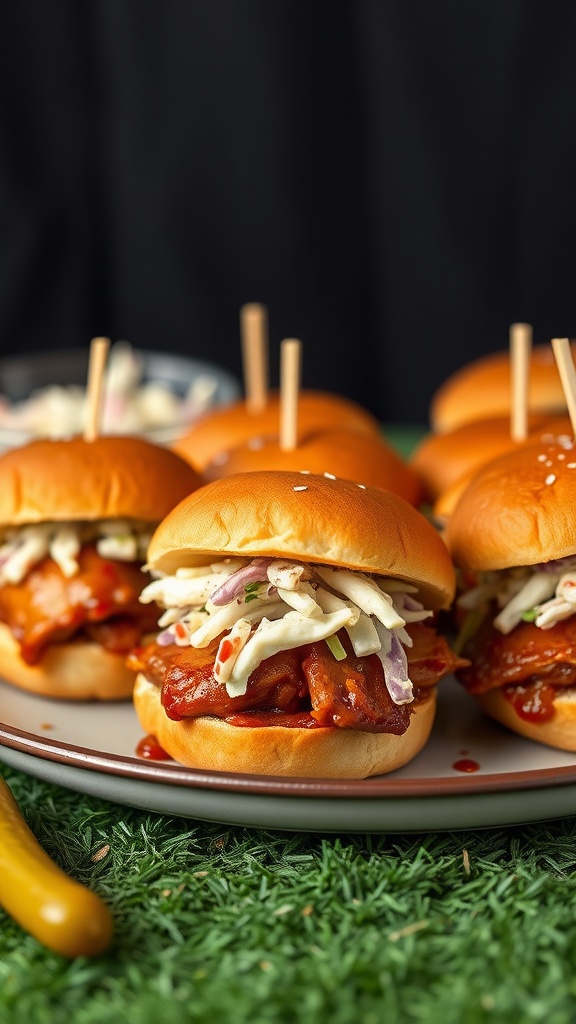
Mini BBQ pulled pork sliders are the perfect game day finger food! These tiny sandwiches pack a punch with smoky, sweet flavors that everyone will love. They’re simple to make and can be prepped ahead of time, making your game day experience hassle-free.
Just imagine tender pulled pork smothered in tangy barbecue sauce, topped with crunchy coleslaw, all nestled between soft slider buns. They are messy in the best way, and they disappear quickly, so be prepared to make a few batches!
Ingredients
- 2 pounds pork shoulder
- 1 cup BBQ sauce
- 1 cup coleslaw mix
- 1/2 cup coleslaw dressing
- 12 slider buns
- Salt and pepper to taste
- Pickles for garnish (optional)
Instructions
- Cook the Pork: Season the pork shoulder with salt and pepper. Place it in a slow cooker and cover with half of the BBQ sauce. Cook on low for 6-8 hours until tender.
- Shred the Pork: Once cooked, remove the pork from the slow cooker and shred it using two forks. Mix the shredded pork with the remaining BBQ sauce.
- Make the Slaw: In a bowl, combine the coleslaw mix with coleslaw dressing. Mix well to coat all the slaw.
- Assemble the Sliders: Place a generous amount of the shredded pork on each slider bun, top with coleslaw, and add pickles if desired.
- Serve: Enjoy these sliders warm and watch them disappear!
Loaded Nachos with All the Fixings
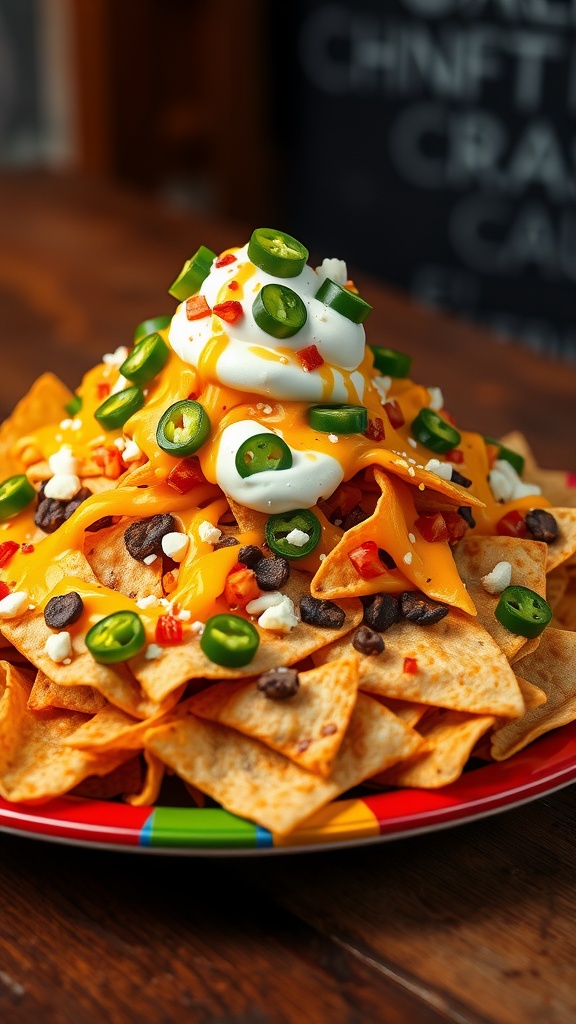
Loaded nachos are the perfect game day finger food that everyone can enjoy! With crispy tortilla chips topped with a melty blend of cheeses, seasoned meat, and a colorful array of fresh toppings, this dish is a true crowd-pleaser. The combination of flavors and textures creates a deliciously satisfying snack that’s quick and easy to prepare.
Making loaded nachos is a breeze! Just layer your ingredients and pop them in the oven. In no time, you’ll have a cheesy, gooey dish that’s ready for sharing. Whether it's for a big game or a casual get-together, these nachos will keep everyone coming back for more.
Ingredients
- 1 bag tortilla chips
- 2 cups shredded cheddar cheese
- 1 cup black beans, rinsed and drained
- 1 cup cooked ground beef or shredded chicken
- 1/2 cup diced tomatoes
- 1/4 cup sliced jalapeños
- 1/2 cup sour cream
- 1/4 cup chopped green onions
- 1/4 cup sliced black olives (optional)
Instructions
- Preheat your oven to 350°F (175°C).
- On a large baking sheet, spread out a layer of tortilla chips.
- Top the chips with half of the shredded cheese, cooked meat, black beans, and diced tomatoes.
- Add another layer of chips and repeat the topping process with the remaining ingredients.
- Sprinkle the last of the cheese on top and add jalapeños if desired.
- Bake in the oven for about 10-15 minutes, or until the cheese is melted and bubbly.
- Remove from the oven and garnish with sour cream, green onions, and black olives before serving.
Crispy Bacon-Wrapped Tater Tots
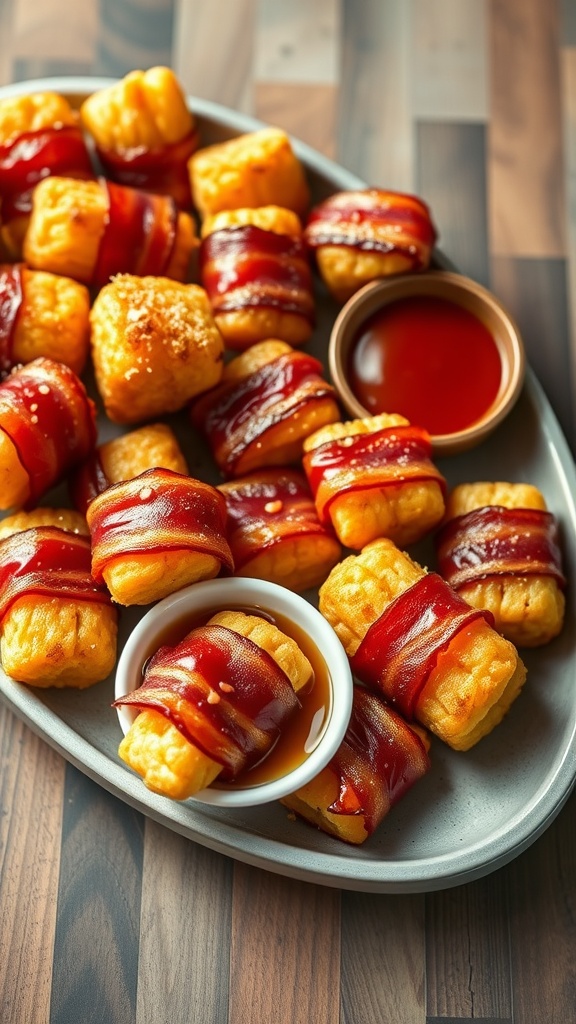
Crispy bacon-wrapped tater tots are the ultimate game day finger food! Combining the crunchy, savory goodness of bacon with the fluffy, golden potatoes creates a snack that's irresistible. Each bite offers a satisfying crunch followed by a warm, creamy center, making these bites a hit for any gathering.
This recipe is super simple to make, perfect for both seasoned cooks and beginners. Just wrap, bake, and enjoy the deliciousness!
Ingredients
- 1 bag frozen tater tots
- 1 lb bacon, cut in half
- 1/2 cup barbecue sauce (optional)
- Salt and pepper to taste
- Cooking spray
Instructions
- Preheat your oven to 400°F (200°C). Line a baking sheet with parchment paper and lightly spray it with cooking spray.
- Take a tater tot and wrap a piece of bacon around it, securing with a toothpick if necessary. Place it on the prepared baking sheet.
- Repeat with all tater tots, then season them with salt and pepper.
- Bake in the preheated oven for 20-25 minutes, or until the bacon is crispy and golden.
- If desired, brush with barbecue sauce during the last few minutes of baking for extra flavor.
- Serve warm with your favorite dipping sauce.
Classic Deviled Eggs with Paprika

Deviled eggs are a timeless appetizer that never fails to impress at gatherings, especially on game day. With their creamy, tangy filling and a sprinkle of paprika, they bring a delightful flavor that pairs perfectly with the excitement of the game. Plus, they're easy to whip up, making them a go-to choice for any party.
These classic deviled eggs are not only visually appealing but also versatile. You can adjust the seasoning to match your taste, and they can be made ahead of time, so you can relax and enjoy the game with your friends. Let's jump into the ingredients and instructions to make these tasty bites!
Ingredients
- 6 large eggs
- 1/4 cup mayonnaise
- 1 teaspoon mustard (Dijon or yellow)
- 1 teaspoon white vinegar
- Salt and pepper to taste
- Paprika for garnish
- Chives or parsley for garnish (optional)
Instructions
- Hard-Boil the Eggs: Place the eggs in a saucepan and cover them with cold water. Bring to a boil, then remove from heat and cover. Let them sit for about 12 minutes.
- Cool and Peel: After 12 minutes, transfer the eggs to an ice bath to cool. Once cooled, peel the eggs under running water for easier removal of the shells.
- Prepare the Filling: Cut the eggs in half lengthwise and carefully remove the yolks, placing them in a mixing bowl. Mash the yolks with mayonnaise, mustard, vinegar, salt, and pepper until smooth.
- Fill the Egg Whites: Spoon or pipe the yolk mixture back into the egg whites.
- Garnish: Sprinkle paprika over the top and add chives or parsley for an extra touch.
Buffalo Chicken Dip in a Bread Bowl
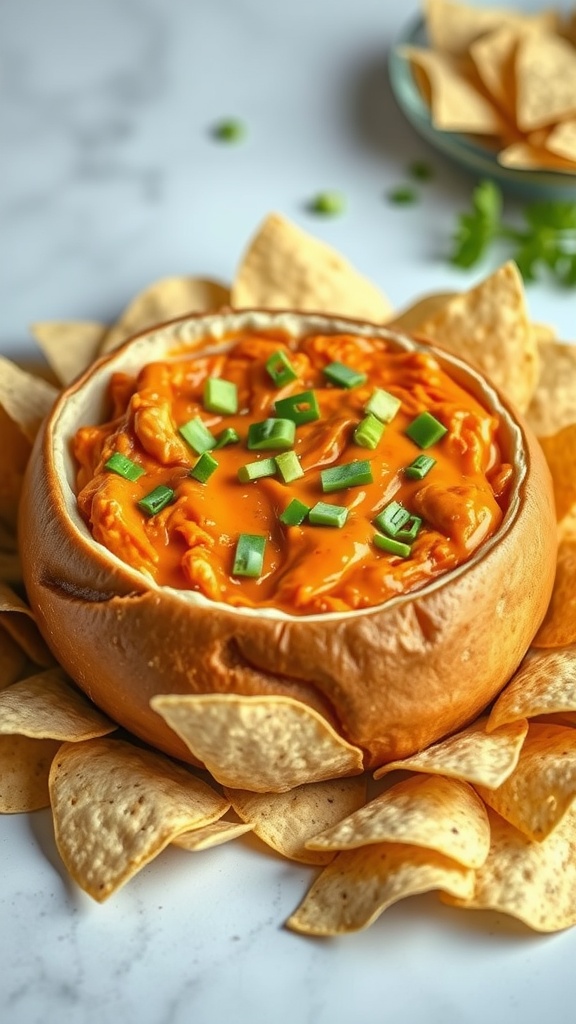
Buffalo Chicken Dip in a Bread Bowl is the ultimate game day treat. It’s creamy, spicy, and packed with flavor, making it a hit at any gathering. The dip combines shredded chicken, cream cheese, ranch dressing, buffalo sauce, and cheese for a deliciously rich experience. Plus, serving it in a bread bowl adds a fun twist and makes cleanup a breeze!
This recipe is simple to make, requiring just a few ingredients and minimal prep time. It’s perfect for dipping with chips or veggies, allowing everyone to customize their bites. Whether it’s for a big game or a casual get-together, this dish will surely impress your friends!
Ingredients
- 2 cups cooked shredded chicken
- 8 oz cream cheese, softened
- 1/2 cup ranch dressing
- 1 cup buffalo wing sauce
- 1 cup shredded cheddar cheese
- 1 loaf of round bread (for the bowl)
- Chopped green onions (for garnish)
Instructions
- Preheat your oven to 350°F (175°C).
- In a mixing bowl, combine the shredded chicken, cream cheese, ranch dressing, buffalo sauce, and half of the cheddar cheese. Mix until well blended.
- Cut the top off the bread loaf and hollow out the inside to create a bowl. Leave enough bread around the edges for stability.
- Fill the hollowed bread bowl with the chicken mixture and top with the remaining cheddar cheese.
- Bake in the preheated oven for 25-30 minutes, or until the cheese is melted and bubbly.
- Garnish with chopped green onions before serving.
- Serve with chips, veggies, or the bread you've hollowed out!
Sweet and Spicy Meatballs
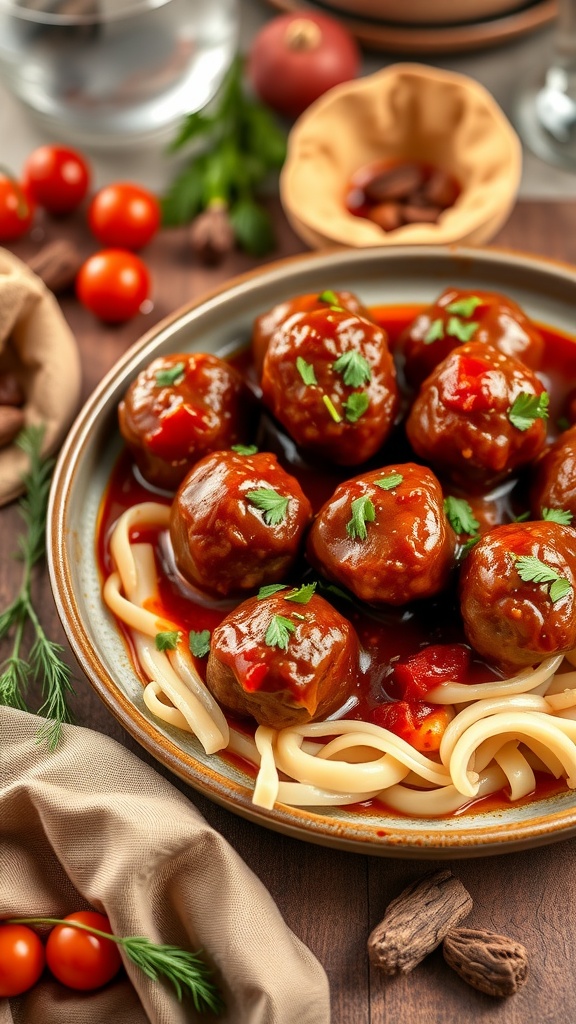
These sweet and spicy meatballs are a fantastic choice for game day gatherings. They combine a rich, savory flavor with a hint of sweetness that will tantalize your taste buds. Perfectly bite-sized, these meatballs make for easy snacking while cheering on your favorite team.
Making these meatballs is simple and fun! Just mix up the ingredients, roll them into balls, and let them cook in a delicious sauce. You can serve them on toothpicks for easy handling, ensuring that your guests can enjoy them without missing a play.
Ingredients
- 1 pound ground beef or turkey
- 1/2 cup breadcrumbs
- 1/4 cup grated Parmesan cheese
- 1/4 cup chopped onion
- 1 clove garlic, minced
- 1/4 cup chopped fresh parsley
- 1 egg
- 1/2 teaspoon salt
- 1/2 teaspoon black pepper
- 1 cup barbecue sauce
- 1/4 cup honey
- 1/4 teaspoon cayenne pepper (adjust to taste)
Instructions
- In a large bowl, combine ground beef or turkey, breadcrumbs, Parmesan cheese, onion, garlic, parsley, egg, salt, and pepper. Mix until well combined.
- Form the mixture into small meatballs, about 1 inch in diameter, and place them on a baking sheet.
- Preheat your oven to 375°F (190°C). Bake the meatballs for 20-25 minutes, or until cooked through.
- While the meatballs are baking, mix together the barbecue sauce, honey, and cayenne pepper in a saucepan over medium heat. Stir until heated through.
- Once the meatballs are done, transfer them to the sauce and let them simmer for 5-10 minutes, allowing them to soak up the flavors.
- Serve warm on toothpicks or over a bed of noodles for a delightful game-day treat!
Zesty Guacamole with Tortilla Chips
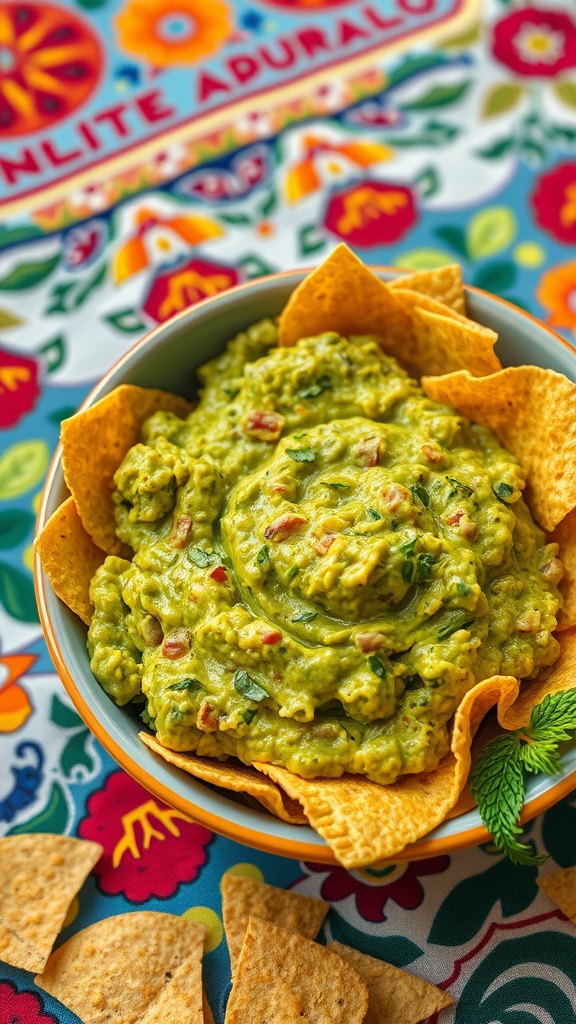
Guacamole is a hit at any gathering, and its fresh, creamy taste makes it a perfect finger food for game day. This zesty version combines ripe avocados with lime, garlic, and a hint of spice, creating a dip so good you’ll want to eat it straight from the bowl. Plus, it’s super easy to whip up, making it a go-to recipe for busy hosts.
Pair this guacamole with crispy tortilla chips for the ultimate snack. The crunch of the chips complements the smoothness of the guacamole, creating a delightful texture that everyone loves. Whether you’re cheering for your favorite team or just enjoying a casual hangout, this guacamole recipe is sure to impress.
Ingredients
- 3 ripe avocados
- 1 lime, juiced
- 1 small onion, finely chopped
- 1 medium tomato, diced
- 1-2 cloves of garlic, minced
- 1 small jalapeño, finely chopped (optional for spice)
- Salt, to taste
- Fresh cilantro, chopped (optional)
- Tortilla chips, for serving
Instructions
- Prepare the Avocados: Cut the avocados in half, remove the pit, and scoop the flesh into a mixing bowl.
- Mash: Use a fork or a potato masher to mash the avocados to your preferred level of creaminess.
- Add Ingredients: Stir in lime juice, chopped onion, diced tomato, minced garlic, and jalapeño (if using). Mix well.
- Season: Add salt to taste and fold in fresh cilantro if desired.
- Serve: Transfer the guacamole to a serving bowl and enjoy with tortilla chips!
Stuffed Mini Peppers with Cream Cheese
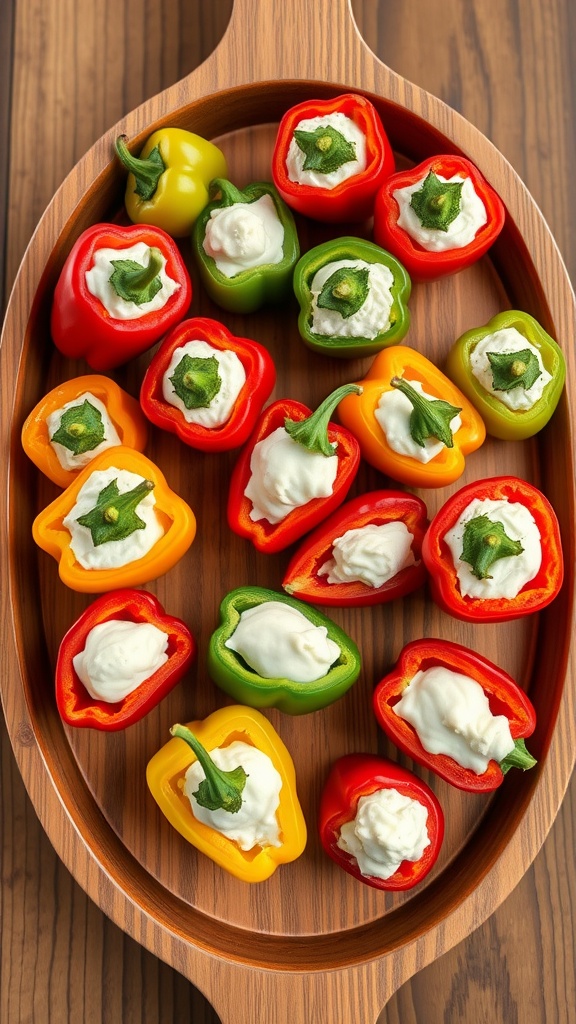
Stuffed mini peppers are a delightful treat for any game day gathering. With their vibrant colors and crunchy texture, they offer a fun and tasty way to bring some zing to your finger food platter. The creamy filling pairs perfectly with the sweet peppers, creating a satisfying bite that's both fresh and indulgent.
This recipe is super simple to whip up, making it a great choice for both novice cooks and seasoned chefs. Just stuff the peppers with a creamy, tangy filling and you have a crowd-pleaser that will disappear in no time!
Ingredients
- 20 mini sweet peppers (various colors)
- 8 oz cream cheese, softened
- 1/2 cup shredded cheddar cheese
- 1/4 cup sour cream
- 1 teaspoon garlic powder
- 1 teaspoon onion powder
- 1 tablespoon fresh chives, chopped
- Salt and pepper to taste
Instructions
- Preheat your oven to 350°F (175°C) if you want to warm them up later.
- Cut the tops off the mini peppers and remove the seeds. Set them aside.
- In a medium bowl, combine the softened cream cheese, shredded cheddar, sour cream, garlic powder, onion powder, chives, and a pinch of salt and pepper. Mix until smooth.
- Using a spoon or a piping bag, fill each mini pepper with the cream cheese mixture.
- If desired, place the stuffed peppers on a baking sheet and bake for 10-15 minutes until the cheese is warm and slightly bubbly.
- Let them cool slightly before serving. Enjoy your stuffed mini peppers!
Vegetable Spring Rolls with Peanut Dipping Sauce
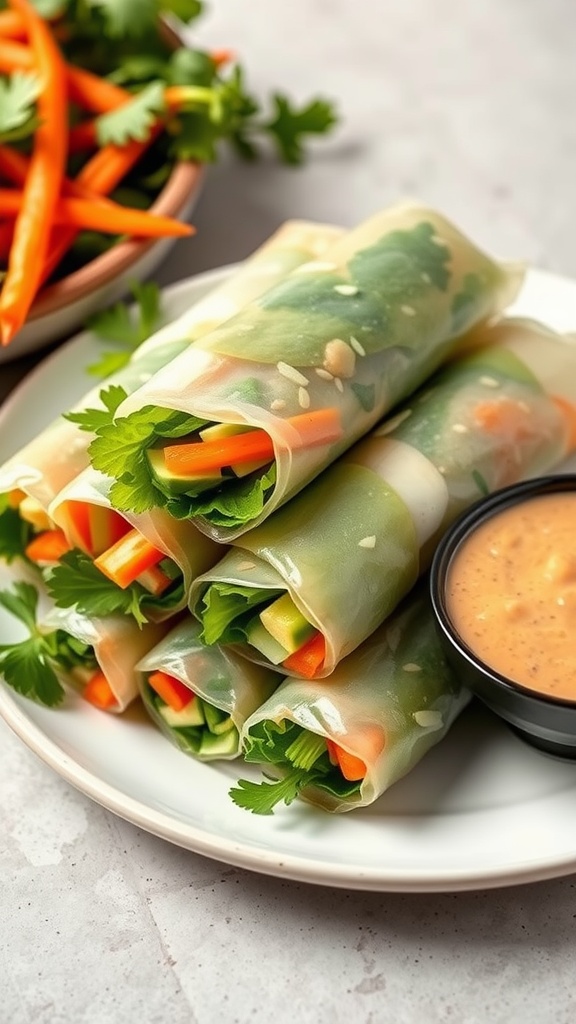
These vegetable spring rolls are a fresh and crunchy addition to your game day spread. They’re packed with vibrant veggies and wrapped in delicate rice paper, offering a deliciously light bite. Paired with a creamy peanut dipping sauce, these rolls are a delightful combination of textures and flavors that everyone will love.
Plus, they're easy to make! Just gather your favorite vegetables, roll them up, and whip up the sauce in no time. Whether you’re hosting a gathering or just snacking while watching the big game, these spring rolls are sure to be a hit.
Ingredients
- 8 rice paper wrappers
- 1 cup shredded carrots
- 1 cup cucumber, julienned
- 1 cup bell peppers, thinly sliced
- 1 cup fresh spinach leaves
- 1/2 cup fresh cilantro leaves
- 1/4 cup sesame seeds (optional)
Instructions
- Prepare the Vegetables: Wash and cut all the vegetables into thin strips or shreds.
- Soak the Rice Paper: Fill a large bowl with warm water. Dip each rice paper wrapper in the water for about 10-15 seconds until it becomes pliable.
- Fill the Wrapper: Lay the soaked wrapper on a clean surface. Place a small handful of the prepared vegetables and a few cilantro leaves in the center of the wrapper.
- Roll It Up: Fold the sides of the wrapper over the filling, then roll from the bottom up, tucking tightly as you go.
- Make the Dipping Sauce: In a bowl, mix together 1/4 cup peanut butter, 1 tablespoon soy sauce, 1 tablespoon honey, and 1 tablespoon water until smooth.
- Serve: Enjoy the spring rolls with the peanut dipping sauce!
Savory Cheddar and Chive Biscuits
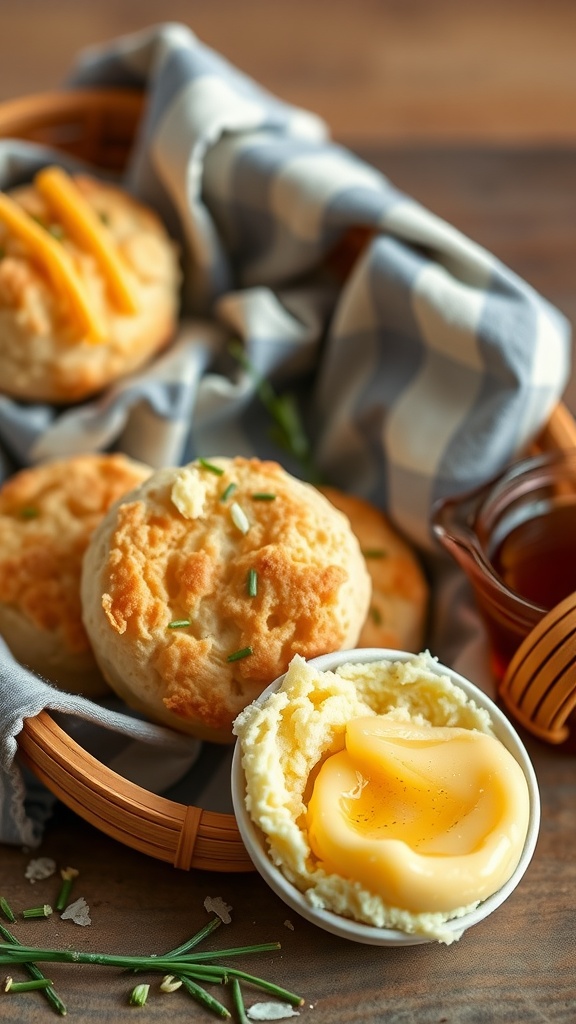
These savory cheddar and chive biscuits are a delightful addition to any game day spread. They offer a perfect balance of rich cheddar flavor with the freshness of chives, making them an ideal finger food for snacking while cheering for your favorite team. Not only are they delicious, but they’re also simple to make, ensuring you can whip them up quickly before the big game.
The light and fluffy texture combined with the cheesy, herby goodness creates a mouthwatering experience that will leave everyone coming back for more. Serve them warm with a dollop of butter or alongside your favorite dips, and watch them disappear fast!
Ingredients
- 2 cups all-purpose flour
- 1 tablespoon baking powder
- 1/2 teaspoon salt
- 1/4 cup unsalted butter, cold and cubed
- 1 cup shredded cheddar cheese
- 1/4 cup chopped fresh chives
- 3/4 cup milk
Instructions
- Preheat your oven to 400°F (200°C) and line a baking sheet with parchment paper.
- In a large bowl, whisk together the flour, baking powder, and salt.
- Add the cold butter and mix until the mixture resembles coarse crumbs.
- Stir in the cheddar cheese and chives.
- Pour in the milk and mix until just combined, being careful not to overwork the dough.
- Turn the dough out onto a floured surface and gently pat it into a rectangle, about 1 inch thick.
- Cut biscuits using a round cutter, and place them onto the prepared baking sheet.
- Bake for 15-20 minutes or until golden brown on top. Serve warm with butter or your choice of dip.
Mini Quiches with Spinach and Feta

Mini quiches with spinach and feta are the perfect finger food for game day. These bite-sized delights are packed with a savory flavor, thanks to the fresh spinach and creamy feta cheese. They are simple to make, so you can spend more time enjoying the game and less time in the kitchen.
The combination of flaky crust, rich egg filling, and the tangy taste of feta offers a delicious contrast that will please everyone at your gathering. Plus, they’re easy to customize with your favorite ingredients, making them a great addition to any snack table.
Ingredients
- 1 pre-made pie crust or puff pastry
- 4 large eggs
- 1 cup milk
- 1 cup fresh spinach, chopped
- 1/2 cup feta cheese, crumbled
- 1/4 cup onion, finely chopped
- 1/2 teaspoon salt
- 1/4 teaspoon black pepper
- 1/4 teaspoon garlic powder
Instructions
- Preheat your oven to 375°F (190°C).
- Roll out the pie crust or puff pastry and cut it into circles to fit into a muffin tin. Press each circle into the muffin cups.
- In a mixing bowl, whisk together the eggs and milk. Add salt, pepper, and garlic powder. Mix well.
- Stir in the chopped spinach, crumbled feta, and onion.
- Pour the egg mixture into each pastry-lined muffin cup, filling them about 3/4 full.
- Bake in the preheated oven for 20-25 minutes, or until the egg is set and the tops are lightly golden.
- Let them cool slightly before removing from the tin. Serve warm and enjoy!
Crispy Sweet Potato Fries with Dipping Sauce
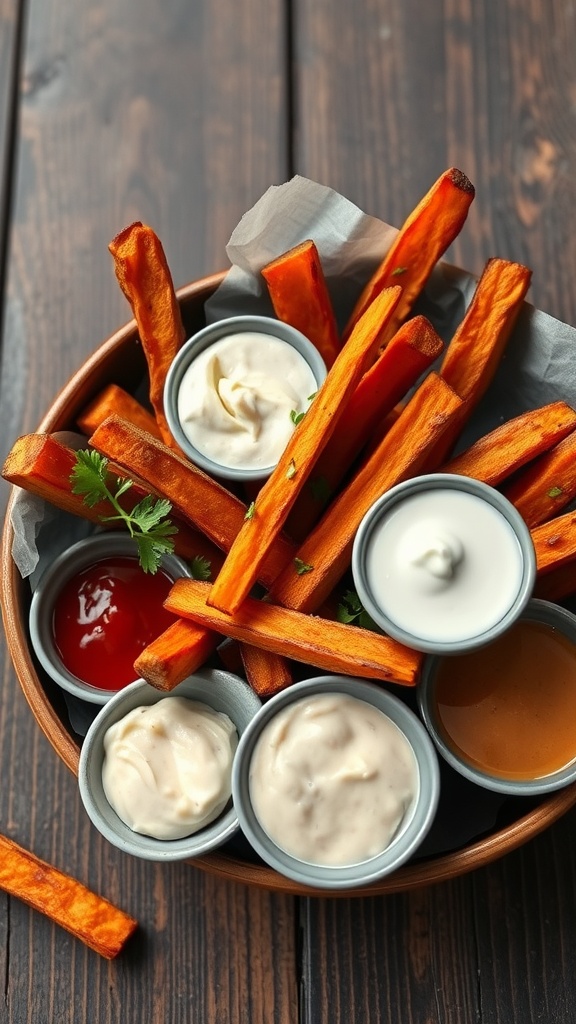
If you’re looking for a tasty and healthier alternative to regular fries, crispy sweet potato fries are the way to go! These vibrant orange beauties are naturally sweet, crispy on the outside, and soft on the inside, making them perfect for snacking while watching the game. Plus, whipping them up is simple and requires only a few ingredients.
Pair your fries with a variety of dipping sauces like ranch, ketchup, or honey mustard for a flavor explosion in every bite. Your guests will love this crowd-pleasing finger food that’s not only delicious but also adds a colorful touch to your game day spread!
Ingredients
- 2 large sweet potatoes
- 2 tablespoons olive oil
- 1 teaspoon garlic powder
- 1 teaspoon paprika
- Salt and pepper to taste
- Your choice of dipping sauces (ranch, ketchup, honey mustard, etc.)
Instructions
- Preheat your oven to 425°F (220°C) and line a baking sheet with parchment paper.
- Peel the sweet potatoes and cut them into fry shapes, about 1/4 inch thick.
- In a large bowl, toss the sweet potato fries with olive oil, garlic powder, paprika, salt, and pepper until evenly coated.
- Spread the fries in a single layer on the baking sheet, ensuring they don’t touch for maximum crispiness.
- Bake for 25-30 minutes, flipping halfway through, until they are golden brown and crispy.
- Serve hot with your favorite dipping sauces!
Pepperoni Pizza Rolls

Pepperoni pizza rolls are the ultimate game day snack that combines the classic flavors of pizza into an easy-to-eat bite. They are soft, cheesy, and packed with savory pepperoni, making them a favorite for any gathering.
These rolls are simple to make, requiring just a few ingredients and minimal prep time. Perfect for sharing, they pair wonderfully with marinara sauce for dipping, adding a delicious twist to your game day spread.
Ingredients
- 1 package refrigerated pizza dough
- 1 cup shredded mozzarella cheese
- 1 cup sliced pepperoni
- 1/2 cup pizza sauce (for dipping)
- 1 tablespoon olive oil
- 1 teaspoon garlic powder
- 1 teaspoon Italian seasoning
Instructions
- Preheat the Oven: Preheat your oven to 400°F (200°C) and line a baking sheet with parchment paper.
- Prepare the Dough: Roll out the pizza dough on a floured surface into a rectangle shape. Make it about 1/4 inch thick.
- Add Fillings: Sprinkle mozzarella cheese evenly over the dough, then layer the pepperoni slices on top. You can add a sprinkle of garlic powder and Italian seasoning for extra flavor.
- Roll It Up: Starting from one long edge, carefully roll the dough into a tight cylinder. Pinch the seams to seal.
- Slice and Bake: Cut the rolled dough into 1-inch pieces and place them on the baking sheet. Brush the tops with olive oil, and bake for 15-20 minutes until golden brown.
- Serve: Let them cool slightly, then serve warm with pizza sauce for dipping. Enjoy your delicious pepperoni pizza rolls!
Homemade Hummus with Vegetable Dippers
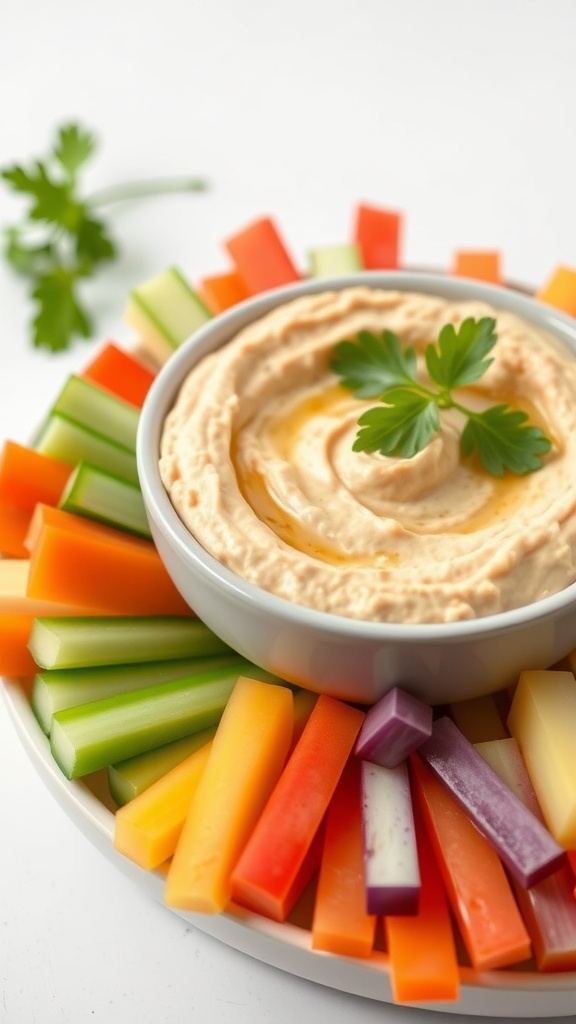
Homemade hummus is the perfect addition to any game day spread. It's creamy, savory, and packed with flavor, making it a hit for everyone at the party. Plus, it’s incredibly simple to whip up, allowing you to focus on enjoying the game rather than spending hours in the kitchen.
Pair this delicious dip with a colorful array of fresh vegetables for crunch and added nutrition. Your guests will love dipping crisp celery, colorful bell peppers, and crunchy carrots into this wholesome treat. It’s not just a great snack; it’s a healthy option that everyone can feel good about.
Ingredients
- 1 can (15 oz) chickpeas, drained and rinsed
- 1/4 cup tahini
- 2 tablespoons olive oil
- 2 tablespoons lemon juice
- 1 garlic clove, minced
- 1/2 teaspoon cumin
- Salt and pepper to taste
- Water, as needed for consistency
Instructions
- In a food processor, combine chickpeas, tahini, olive oil, lemon juice, minced garlic, cumin, salt, and pepper.
- Blend until smooth, adding water gradually until you reach your desired consistency.
- Taste and adjust seasoning if necessary.
- Transfer hummus to a serving bowl and drizzle with a bit of olive oil on top.
- Serve with an assortment of fresh vegetable dippers like carrot sticks, cucumber slices, and bell pepper strips.
Bacon-Cheddar Pinwheels

Bacon-Cheddar Pinwheels are a perfect game day snack that packs a delightful punch of flavor. With crispy bacon, gooey cheese, and a soft tortilla, they’re easy to make and even easier to enjoy. These bite-sized treats are sure to disappear quickly during any gathering.
They have a rich, savory taste and are incredibly simple to prepare, making them an ideal choice for both seasoned cooks and kitchen newcomers. Just roll, slice, and serve for a snack that’s sure to be a hit!
Ingredients
- 1 large tortilla
- 1 cup shredded cheddar cheese
- 4 slices of cooked bacon, crumbled
- 1/4 cup cream cheese, softened
- 1 tablespoon ranch seasoning mix (optional)
Instructions
- Spread the softened cream cheese evenly over the tortilla.
- Sprinkle the shredded cheddar cheese and crumbled bacon evenly on top.
- If using, sprinkle ranch seasoning for added flavor.
- Starting from one edge, tightly roll the tortilla into a log shape.
- Slice the rolled tortilla into 1-inch pieces and arrange on a serving platter.
- Serve immediately or refrigerate until ready to serve.
Crispy Onion Rings with Spicy Ketchup
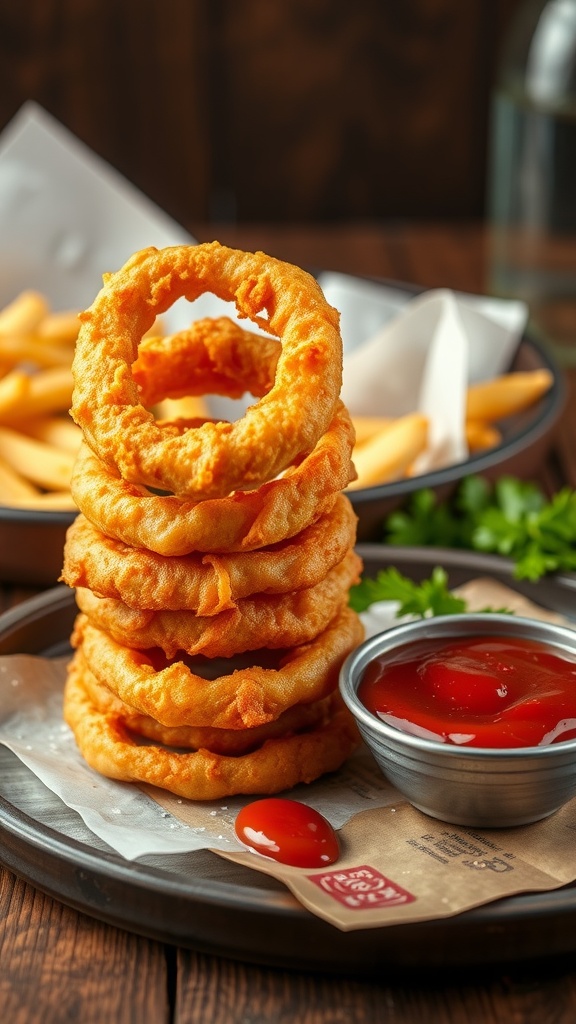
Crispy onion rings are a classic finger food that everyone loves. Coated in a light, crunchy batter, they offer a delightful crunch and a sweet onion flavor that pairs perfectly with a spicy ketchup dip. This recipe is simple to make, making it ideal for gatherings, especially on game day!
The combination of the crispy exterior and the tender onion inside creates a satisfying snack that will have your guests coming back for more. Plus, the spicy ketchup adds just the right kick to elevate the taste. Let’s get cooking!
Ingredients
- 2 large onions, sliced into 1/4-inch rings
- 1 cup all-purpose flour
- 1 teaspoon baking powder
- 1 teaspoon salt
- 1/2 teaspoon black pepper
- 1/2 teaspoon paprika
- 1 cup cold sparkling water
- Oil for frying
- 1 cup ketchup
- 1 tablespoon hot sauce (adjust to taste)
Instructions
- Prepare the Onions: Peel the onions and slice them into 1/4-inch thick rings. Separate the rings and set aside.
- Make the Batter: In a bowl, mix flour, baking powder, salt, black pepper, and paprika. Gradually whisk in the cold sparkling water until you achieve a smooth batter.
- Heat the Oil: In a deep pot, heat oil over medium-high heat until it reaches about 350°F (175°C).
- Dip and Fry: Dip each onion ring into the batter, letting the excess drip off. Carefully place it in the hot oil. Fry in batches until golden brown, about 2-3 minutes per side. Remove and drain on paper towels.
- Prepare the Spicy Ketchup: In a small bowl, mix ketchup and hot sauce. Adjust the heat to your liking.
- Serve: Arrange the crispy onion rings on a platter with the spicy ketchup on the side for dipping.
Taco Cups with Ground Beef and Cheese
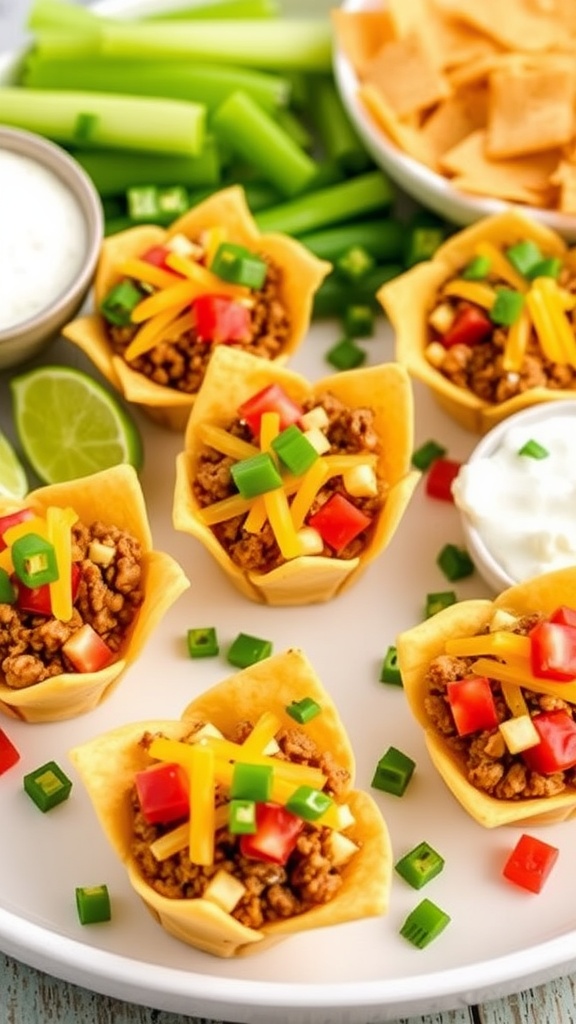
Taco cups are a fun and easy way to enjoy all your favorite taco flavors in a bite-sized form. These little delights are packed with seasoned ground beef, topped with melted cheese, and served in crispy tortilla cups. They’re perfect for game day or any casual gathering where finger foods are a must.
The combination of flavors in these taco cups is sure to please everyone. With a crunchy exterior and savory filling, they offer a satisfying bite that's simple to prepare. Plus, you can customize them with your favorite toppings, like sour cream, salsa, or fresh veggies. Let's get cooking!
Ingredients
- 1 pound ground beef
- 1 packet taco seasoning
- 1 cup shredded cheddar cheese
- 1 cup black beans, drained and rinsed
- 12 small tortilla cups
- 1/2 cup diced tomatoes
- 1/4 cup chopped fresh cilantro
- Sour cream (for serving)
- Optional toppings: sliced jalapeños, avocado, or green onions
Instructions
- Preheat your oven to 350°F (175°C). Arrange the tortilla cups on a baking sheet.
- In a skillet over medium heat, cook the ground beef until browned. Drain excess fat, then add taco seasoning and a splash of water. Stir well and simmer for 5 minutes.
- Fill each tortilla cup with a spoonful of the seasoned beef mixture. Top with black beans and shredded cheddar cheese.
- Bake the taco cups in the preheated oven for about 10-12 minutes, or until the cheese is melted and bubbly.
- Remove from the oven and let cool slightly. Top with diced tomatoes, cilantro, and any other desired toppings. Serve warm with sour cream on the side.
Bite-Sized Caprese Skewers
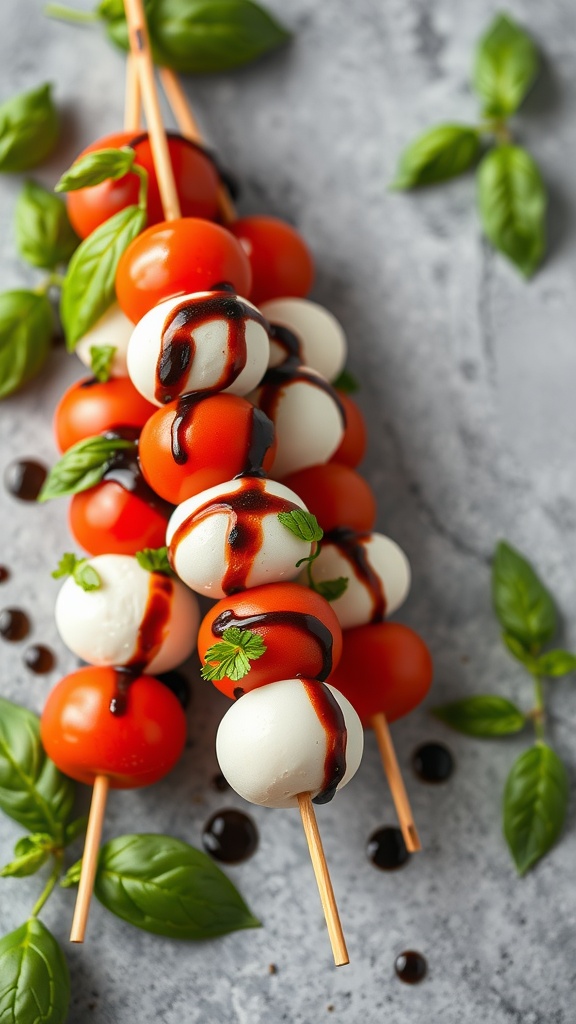
Bite-sized Caprese skewers are a delightful twist on the classic Italian salad. Combining fresh mozzarella, cherry tomatoes, and fragrant basil, these skewers are not only tasty but also visually appealing. The burst of flavors from the juicy tomatoes and creamy cheese, paired with a drizzle of balsamic glaze, makes them a perfect finger food for game day gatherings.
This recipe is super easy to whip up, making it ideal for both novice cooks and seasoned chefs. With just a few simple ingredients, you can create a crowd-pleaser that’s sure to impress your guests without spending hours in the kitchen.
Ingredients
- 1 pint cherry tomatoes
- 1 pound fresh mozzarella balls
- Fresh basil leaves
- Balsamic glaze
- Salt and pepper to taste
- Skewers
Instructions
- Prep the Ingredients: Rinse the cherry tomatoes and basil leaves. Drain the mozzarella balls if they’re packed in water.
- Assemble the Skewers: On each skewer, thread a cherry tomato, followed by a basil leaf, and then a mozzarella ball. Repeat this pattern until the skewer is filled, leaving some space at the end for easy handling.
- Season: Once all the skewers are assembled, drizzle them with balsamic glaze and add a sprinkle of salt and pepper to enhance the flavors.
- Serve: Arrange the skewers on a platter and enjoy fresh. They are best served at room temperature.
Coconut Shrimp with Citrus Dipping Sauce
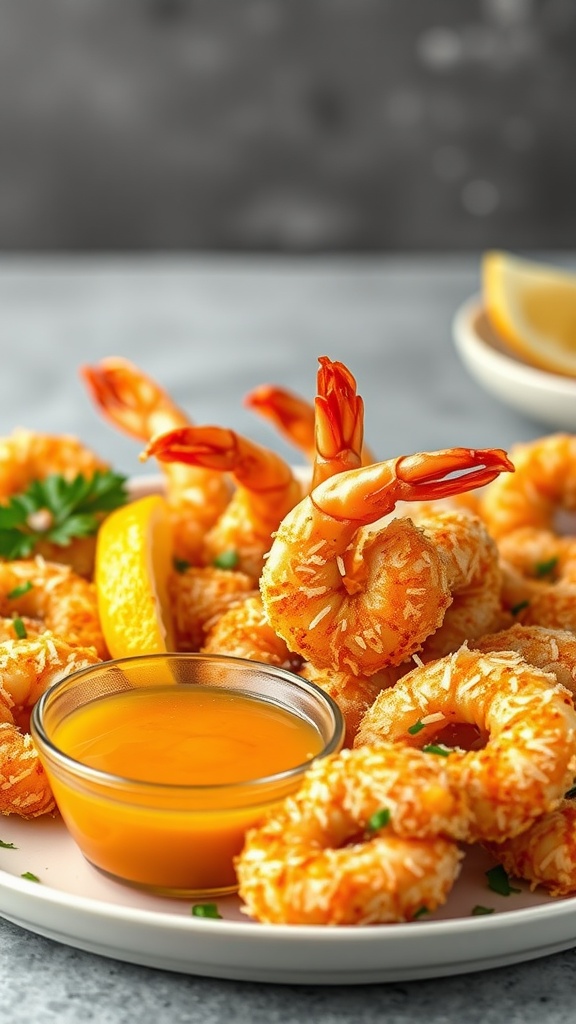
Coconut shrimp is a delightful combination of sweet and savory that makes for an irresistible game day finger food. The crispy, golden exterior contrasts beautifully with the tender shrimp inside, while the tropical coconut adds a unique twist that your guests will love. Dipped in a refreshing citrus sauce, this dish is not only delicious but also simple to prepare.
This recipe is perfect for gatherings, providing a crowd-pleasing option that can be served hot or at room temperature. It’s easy enough for a weekday snack yet fancy enough to impress your friends on game day!
Ingredients
- 1 pound large shrimp, peeled and deveined
- 1 cup shredded coconut
- 1 cup panko breadcrumbs
- 2 large eggs
- 1/2 cup all-purpose flour
- 1 teaspoon salt
- 1/2 teaspoon black pepper
- Vegetable oil for frying
Instructions
- Prepare the Shrimp: In a bowl, mix flour, salt, and pepper. In another bowl, whisk the eggs. In a third bowl, combine panko breadcrumbs and shredded coconut.
- Coat the Shrimp: Dredge each shrimp in the flour mixture, dip it in the egg, and then coat it with the coconut-panko mixture.
- Fry the Shrimp: Heat vegetable oil in a large skillet over medium heat. Once hot, add the shrimp in batches, frying until golden brown and crispy, about 2-3 minutes per side. Transfer to a paper towel-lined plate to drain excess oil.
- Make the Citrus Sauce: In a small bowl, mix together 1/2 cup orange juice, 2 tablespoons lime juice, and 1 tablespoon honey. Stir until well combined.
- Serve: Arrange the coconut shrimp on a platter with the citrus dipping sauce in the center for dipping. Enjoy!
Chocolate-Dipped Pretzels for a Sweet Treat

Chocolate-dipped pretzels are the perfect blend of sweet and salty, making them an irresistible snack for any game day gathering. The combination of crunchy pretzels enveloped in smooth chocolate creates a delightful texture that everyone will love. Plus, they're super easy to make, so you can whip them up in no time!
These treats are not only fun to eat but can also be customized with colorful sprinkles or drizzled chocolate for an extra pop. They’re sure to be a hit with both kids and adults alike, adding a festive touch to your snack table.
Ingredients
- 1 bag of pretzel rods or twist pretzels
- 2 cups of semi-sweet chocolate chips
- 1 tablespoon of coconut oil (optional, for smoother chocolate)
- Sprinkles or chopped nuts for decoration
Instructions
- Melt the Chocolate: In a microwave-safe bowl, combine the chocolate chips and coconut oil. Heat in 30-second intervals, stirring in between, until completely melted and smooth.
- Dip the Pretzels: Dip each pretzel into the melted chocolate, coating it thoroughly. Allow any excess chocolate to drip off.
- Add Toppings: While the chocolate is still wet, sprinkle your choice of decorations over the pretzels. Get creative with different colors and textures!
- Let Them Set: Place the dipped pretzels on a baking sheet lined with parchment paper. Let them cool until the chocolate hardens. You can speed this up by placing them in the fridge for about 15-20 minutes.
- Serve: Once set, arrange your chocolate-dipped pretzels on a platter and enjoy your sweet treat!
Comments
Post a Comment