- Get link
- X
- Other Apps

13 Delightful Birthday Cake Ideas to Celebrate Your Special Day
Birthday cakes are the highlight of any celebration, adding sweet joy and delight to the festivities. Whether you prefer a classic chocolate fudge or an elaborate tiered masterpiece, there's a cake to fit every taste and style. Let's dive into some ideas that will make your next birthday party unforgettable!
Lemon Drizzle Cake with Citrus Zest
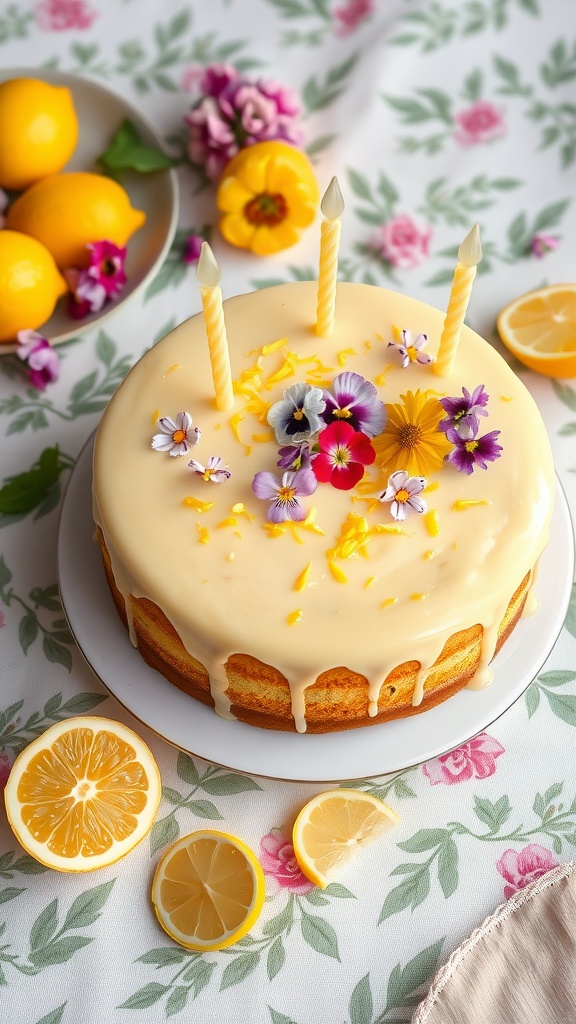
This Lemon Drizzle Cake offers a delightful burst of flavor that’s perfect for any birthday celebration. With its moist, fluffy texture and a tangy lemon glaze, it's sure to impress your guests. The bright citrus notes combined with a sweet drizzle make for a refreshing treat that's simple to whip up. Whether you're an experienced baker or just starting out, this recipe is easy and rewarding.
Each slice reveals a sunny lemon flavor enhanced by citrus zest, creating a cake that’s not only tasty but visually appealing. Pair it with a cup of tea or coffee for a lovely afternoon snack, or serve it as a standout dessert at your next gathering. Get ready to enjoy this zesty treat that everyone will love!
Ingredients
- 1 cup unsalted butter, softened
- 1 cup granulated sugar
- 4 large eggs
- 2 cups all-purpose flour
- 1 tablespoon baking powder
- 1/2 teaspoon salt
- 1/2 cup milk
- Zest of 2 lemons
- Juice of 2 lemons
- 1 cup powdered sugar (for glaze)
Instructions
- Preheat your oven to 350°F (175°C) and grease a 9-inch round cake pan.
- In a mixing bowl, beat together the softened butter and granulated sugar until light and fluffy.
- Add in the eggs one at a time, mixing well after each addition.
- In another bowl, whisk together the flour, baking powder, and salt.
- Gradually add the dry ingredients to the butter mixture, alternating with the milk. Mix until just combined.
- Stir in the lemon zest and lemon juice until evenly distributed.
- Pour the batter into the prepared cake pan and smooth the top.
- Bake for 25-30 minutes, or until a toothpick inserted in the center comes out clean.
- While the cake cools, prepare the glaze by mixing powdered sugar with enough lemon juice to achieve a drizzly consistency.
- Once the cake is cool, pour the glaze over the top, allowing it to drip down the sides. Enjoy your Lemon Drizzle Cake!
Chocolate Chip Cookie Cake
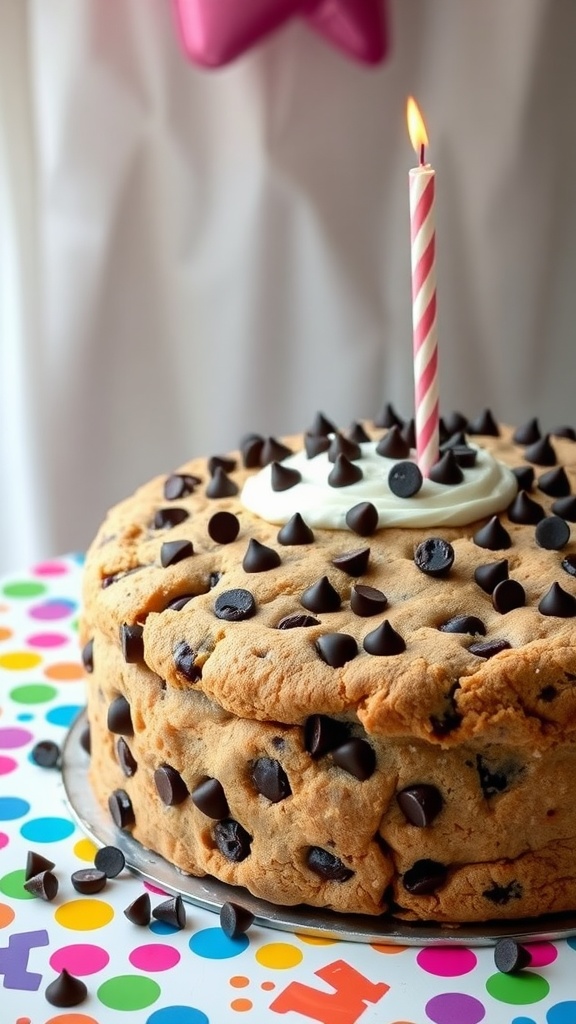
Chocolate chip cookie cake combines the beloved flavors of soft, chewy chocolate chip cookies into a festive cake form. This dessert is a crowd-pleaser, perfect for birthday celebrations or any sweet occasion. With its rich buttery taste and melty chocolate chips, it offers a delightful blend of textures that everyone will love.
Making this cake is a breeze! You don’t need any fancy baking techniques or special equipment. Just mix the ingredients, bake, and you’re ready to enjoy a warm slice topped with whipped cream or ice cream. It’s simple enough for beginners, yet impressive enough for experienced bakers!
Ingredients
- 2 1/2 cups all-purpose flour
- 1 teaspoon baking soda
- 1/2 teaspoon salt
- 3/4 cup unsalted butter, softened
- 3/4 cup granulated sugar
- 3/4 cup brown sugar, packed
- 1 teaspoon vanilla extract
- 2 large eggs
- 2 cups semi-sweet chocolate chips
- 1 cup whipped cream (optional, for topping)
Instructions
- Preheat the oven to 350°F (175°C). Grease and flour a 9-inch round cake pan.
- In a bowl, whisk together flour, baking soda, and salt. Set aside.
- In a large mixing bowl, beat together the softened butter, granulated sugar, and brown sugar until creamy. Add vanilla and eggs, mixing well.
- Gradually add the flour mixture to the wet ingredients, stirring until combined. Fold in the chocolate chips.
- Spread the batter evenly in the prepared cake pan. Bake for 25-30 minutes, or until the cake is golden brown and a toothpick inserted in the center comes out clean.
- Allow the cake to cool before removing it from the pan. Serve warm with whipped cream on top, if desired.
Classic Vanilla Layer Cake
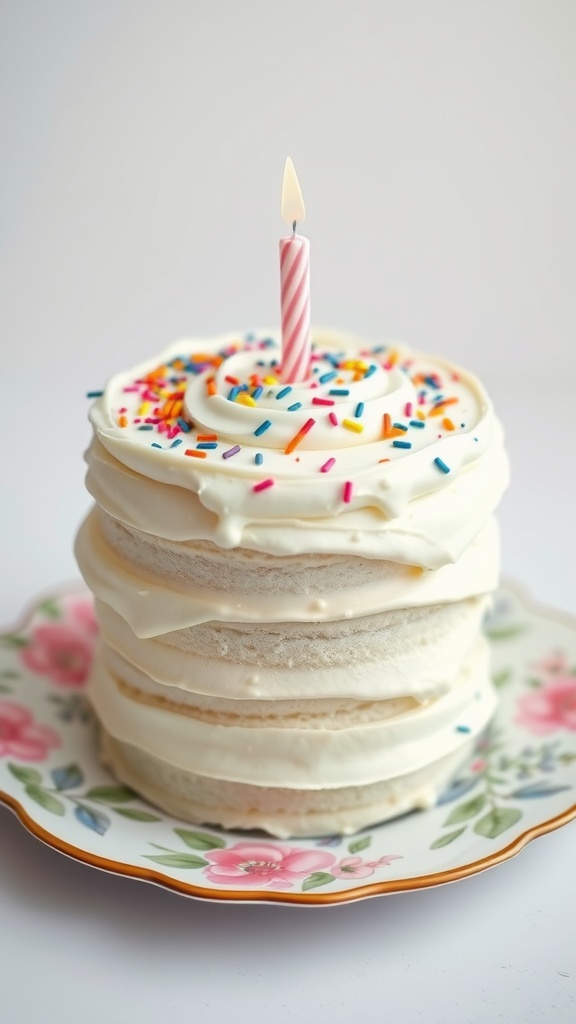
This Classic Vanilla Layer Cake is the perfect treat for any birthday celebration. With its light, fluffy texture and sweet vanilla flavor, it brings smiles to faces young and old. Simple enough for beginner bakers, yet impressive enough for any occasion, this cake is sure to be a hit!
The rich layers, complemented by a smooth frosting, make every bite a delight. You can also personalize it with your favorite decorations, turning it into a beautiful centerpiece. Let’s dive into the recipe!
Ingredients
- 2 ¾ cups all-purpose flour
- 2 ½ teaspoons baking powder
- ½ teaspoon salt
- 1 cup unsalted butter, softened
- 2 cups granulated sugar
- 4 large eggs
- 1 tablespoon vanilla extract
- 1 cup milk
- 4 cups powdered sugar
- ½ cup unsalted butter, softened (for frosting)
- 3 tablespoons heavy cream
- 1 teaspoon vanilla extract (for frosting)
Instructions
- Preheat the oven to 350°F (175°C) and grease three 9-inch round cake pans.
- In a bowl, mix flour, baking powder, and salt. In another bowl, cream together the butter and sugar until light and fluffy.
- Add eggs one at a time, mixing well after each addition. Stir in the vanilla.
- Gradually add the flour mixture to the butter mixture, alternating with milk. Mix until smooth.
- Divide the batter evenly among the prepared pans and bake for 25-30 minutes, or until a toothpick comes out clean.
- Let the cakes cool in the pans for 10 minutes before transferring to wire racks to cool completely.
- For the frosting, beat together the softened butter, heavy cream, vanilla, and powdered sugar until smooth and fluffy.
- Once the cakes are cooled, frost between the layers and over the top and sides of the cake.
- Decorate with sprinkles or any toppings you like. Slice and enjoy your special cake!
Funfetti Cake with Whipped Cream
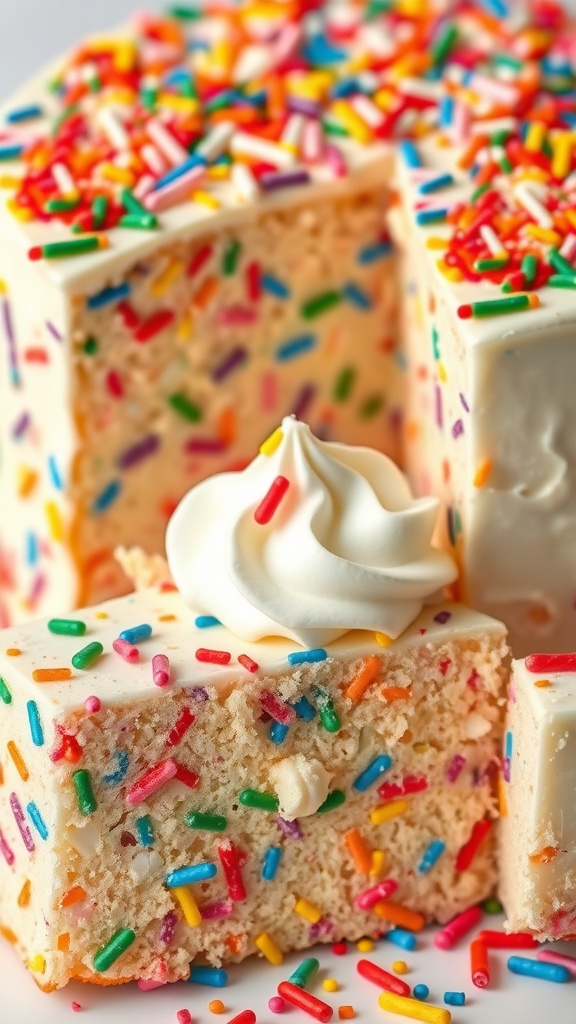
Funfetti cake is a delightful treat that brings joy to any birthday celebration. Its soft, fluffy texture is dotted with colorful sprinkles, making it a feast for the eyes as well as the taste buds. The whipped cream frosting adds a light, airy sweetness that perfectly complements the cake's fun flavors. Best of all, this recipe is simple enough for bakers of all skill levels to whip up with ease.
This cake is not just a dessert; it's a celebration in every bite. The combination of vanilla cake and sprinkles creates a sweet, nostalgic flavor that's sure to please both kids and adults alike. Whether it's for a birthday party or just a sweet treat, this Funfetti cake will be a hit!
Ingredients
- 2 ¾ cups all-purpose flour
- 1 tablespoon baking powder
- ½ teaspoon salt
- 1 ½ cups granulated sugar
- ¾ cup unsalted butter, softened
- 1 cup milk
- 2 teaspoons vanilla extract
- 3 large eggs
- ¾ cup colorful sprinkles
- 1 cup heavy whipping cream
- 2 tablespoons powdered sugar
- 1 teaspoon vanilla extract (for whipped cream)
Instructions
- Preheat your oven to 350°F (175°C). Grease and flour two 9-inch round cake pans.
- In a bowl, whisk together flour, baking powder, and salt. Set aside.
- In a large mixing bowl, cream together the softened butter and sugar until light and fluffy. Add in the eggs one at a time, mixing well after each addition.
- Stir in the vanilla extract and milk, mixing until well combined. Gradually add the dry ingredients to the wet mixture until just combined. Be careful not to overmix.
- Gently fold in the colorful sprinkles.
- Divide the batter evenly between the prepared pans and bake for 25-30 minutes, or until a toothpick inserted into the center comes out clean.
- Allow the cakes to cool in the pans for about 10 minutes, then transfer them to a wire rack to cool completely.
- While the cakes cool, prepare the whipped cream. In a mixing bowl, beat the heavy cream, powdered sugar, and vanilla extract until soft peaks form.
- Once the cakes are completely cool, spread whipped cream between the layers and on top. Garnish with additional sprinkles if desired.
- Slice, serve, and enjoy!
Carrot Cake with Walnuts and Pineapple
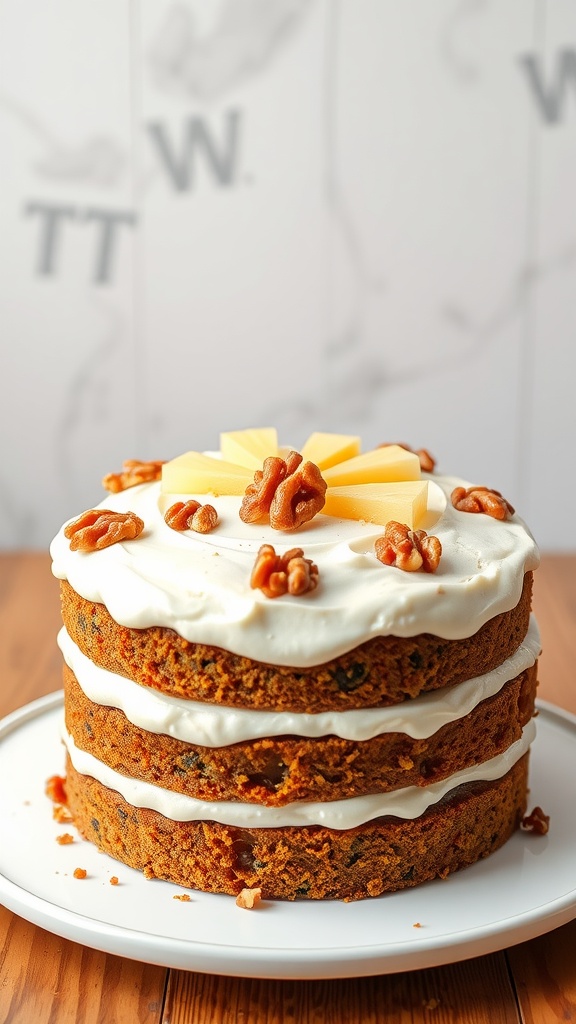
This carrot cake is a delightful treat that combines the natural sweetness of carrots with the crunch of walnuts and the tropical touch of pineapple. It's moist, flavorful, and has a wonderful texture that makes it a hit at any birthday party. Plus, it's easy to make, so you can whip it up without much fuss!
The flavors meld beautifully, resulting in a cake that’s both comforting and refreshing. The cream cheese frosting adds a luscious finish, making each bite irresistibly good. Whether you're celebrating a special occasion or just enjoying a sweet moment, this cake is sure to bring smiles all around.
Ingredients
- 2 cups all-purpose flour
- 2 cups granulated sugar
- 1 teaspoon baking soda
- 1 teaspoon baking powder
- 1/2 teaspoon salt
- 1 teaspoon ground cinnamon
- 1/2 teaspoon ground nutmeg
- 1 cup vegetable oil
- 4 large eggs
- 3 cups grated carrots
- 1 cup crushed pineapple, drained
- 1 cup chopped walnuts
- 1 teaspoon vanilla extract
Instructions
- Preheat your oven to 350°F (175°C) and grease three 9-inch round cake pans.
- In a large bowl, mix together the flour, sugar, baking soda, baking powder, salt, cinnamon, and nutmeg.
- In another bowl, whisk together the oil, eggs, grated carrots, crushed pineapple, and vanilla extract.
- Combine the wet ingredients with the dry ingredients, stirring until just combined. Fold in the chopped walnuts.
- Divide the batter evenly among the prepared pans and bake for 25-30 minutes or until a toothpick inserted in the center comes out clean.
- Let the cakes cool in the pans for about 10 minutes, then remove them from the pans and cool completely on wire racks.
- Once cool, spread cream cheese frosting between the layers and on the top and sides of the cake. Decorate with additional walnuts if desired.
Decadent Chocolate Ganache Cake
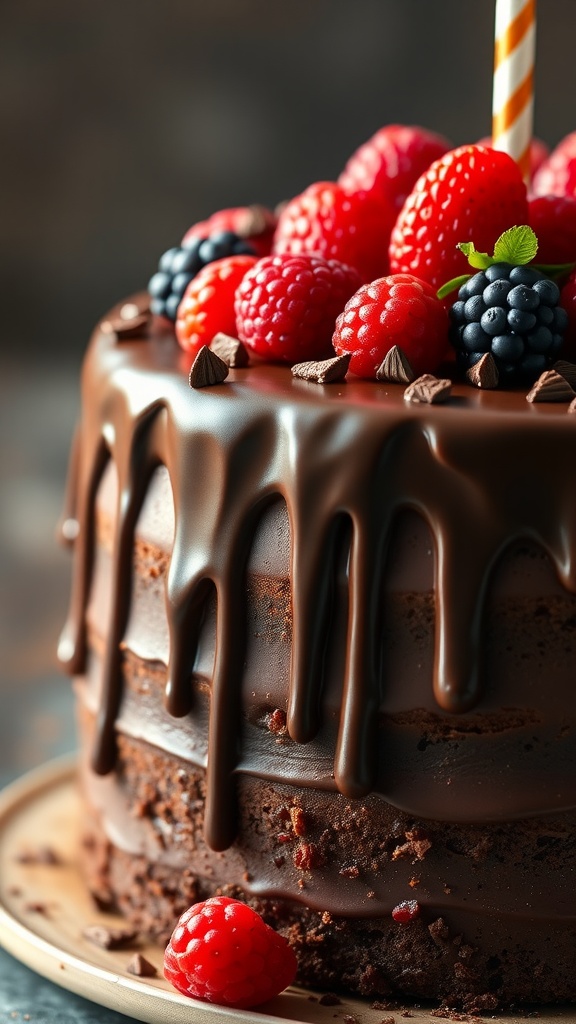
This chocolate ganache cake is a rich, indulgent treat that's perfect for celebrating birthdays or any special occasion. With layers of moist chocolate cake enveloped in a silky ganache, it offers a delightful balance of sweetness and a deep chocolate flavor that chocolate lovers will adore.
The best part? It's surprisingly simple to make! You can whip this cake up in a few hours, and it’s sure to impress your friends and family.
Ingredients
- 1 ¾ cups all-purpose flour
- 2 cups granulated sugar
- ¾ cup unsweetened cocoa powder
- 1 ½ teaspoons baking powder
- 1 ½ teaspoons baking soda
- 1 teaspoon salt
- 2 large eggs
- 1 cup whole milk
- ½ cup vegetable oil
- 2 teaspoons vanilla extract
- 1 cup boiling water
- 2 cups heavy cream
- 12 ounces semi-sweet chocolate, chopped
- Fresh raspberries and mint for decoration
Instructions
- Preheat the oven to 350°F (175°C) and grease two 9-inch round cake pans.
- In a large bowl, mix flour, sugar, cocoa powder, baking powder, baking soda, and salt. Add eggs, milk, oil, and vanilla. Beat on medium speed for 2 minutes. Stir in boiling water until well combined.
- Pour the batter evenly into the prepared pans. Bake for 30-35 minutes or until a toothpick comes out clean. Cool in pans for 10 minutes before transferring to wire racks to cool completely.
- For the ganache, heat the heavy cream in a saucepan until just simmering. Pour over the chopped chocolate and let sit for 5 minutes. Stir until smooth and glossy.
- Once the cakes are cooled, place one layer on a serving plate. Spread a layer of ganache on top, then add the second cake layer. Pour the remaining ganache over the top, allowing it to drip down the sides.
- Decorate with fresh raspberries and mint leaves. Slice and serve!
Strawberry Shortcake with Fresh Berries
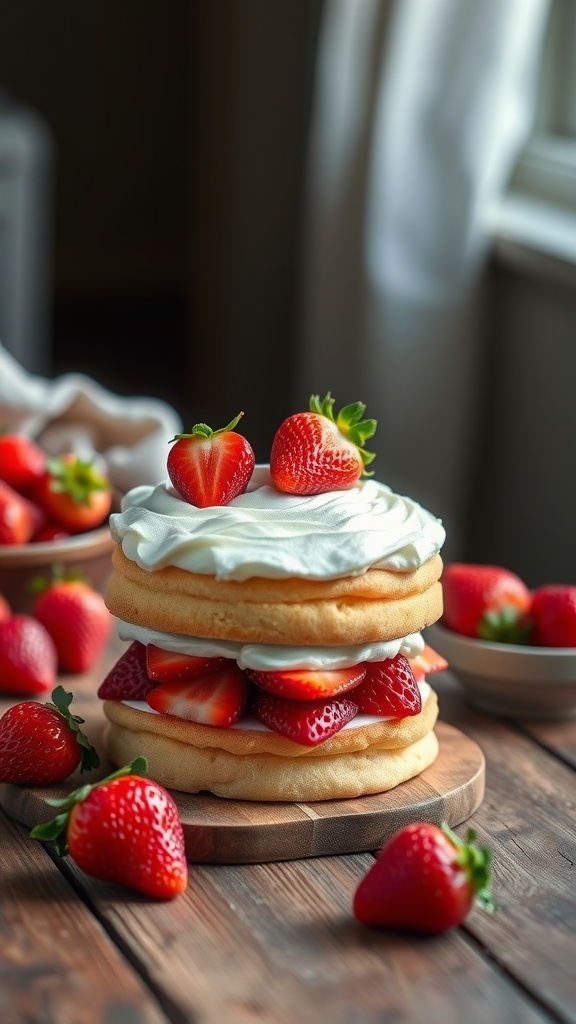
This delightful strawberry shortcake is a true celebration of fresh flavors! With layers of fluffy sponge cake, creamy whipped topping, and juicy strawberries, it's both refreshing and satisfying. Perfect for birthdays or any occasion, this dessert will impress your guests without requiring extensive baking skills.
The combination of sweet strawberries and light, airy cake creates a taste that feels like summer in every bite. Plus, it’s a simple recipe that allows you to enjoy the process of making something special without the fuss. Let's get started!
Ingredients
- 2 cups all-purpose flour
- 1 cup granulated sugar
- 1 tablespoon baking powder
- 1/2 teaspoon salt
- 1/2 cup unsalted butter, softened
- 1 cup milk
- 2 large eggs
- 1 teaspoon vanilla extract
- 2 cups fresh strawberries, sliced
- 1 cup heavy cream
- 2 tablespoons powdered sugar
Instructions
- Preheat the oven to 350°F (175°C). Grease and flour two 9-inch round cake pans.
- In a large bowl, mix flour, sugar, baking powder, and salt. Add softened butter, milk, eggs, and vanilla. Beat with an electric mixer on medium speed for about 2 minutes until smooth.
- Divide the batter evenly between the prepared pans. Bake for 25-30 minutes, or until a toothpick inserted in the center comes out clean. Let cool for 10 minutes before transferring to a wire rack to cool completely.
- While the cakes cool, whip the heavy cream with powdered sugar until stiff peaks form.
- Once the cakes are completely cooled, slice each cake in half horizontally to create four layers. Place one layer on a serving plate, spread a layer of whipped cream, and top with sliced strawberries. Repeat with the remaining layers.
- Top the final layer with more whipped cream and garnish with whole strawberries. Serve immediately or refrigerate until ready to serve.
Red Velvet Cake with Cream Cheese Frosting
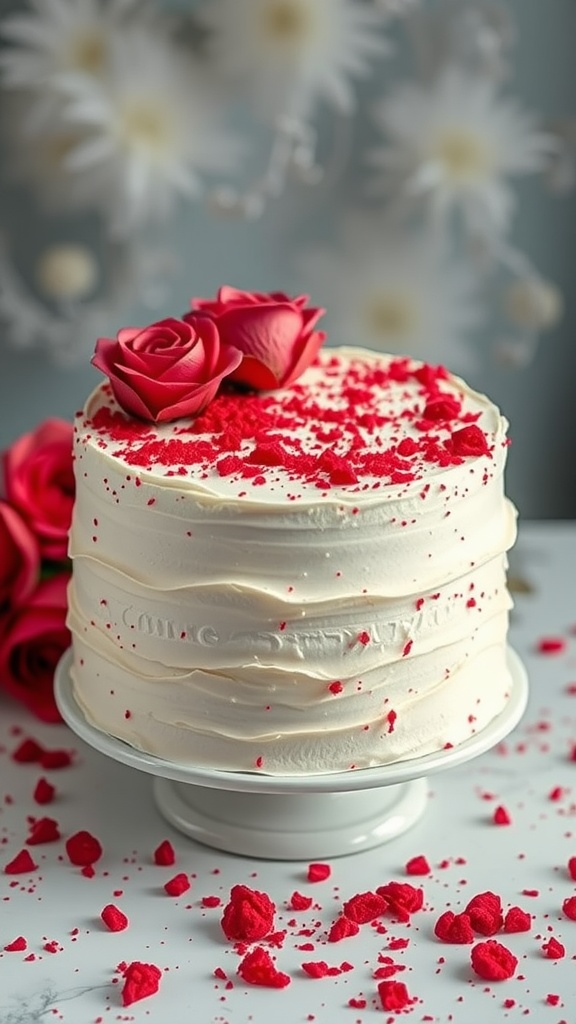
Red Velvet Cake is a showstopper at any birthday celebration. Its vibrant red hue combined with a rich, buttery flavor makes it a favorite among cake lovers. The light and fluffy texture paired with the tangy cream cheese frosting creates a delicious contrast that is both delightful and satisfying. Plus, this cake is surprisingly simple to make, making it a great choice for both novice and experienced bakers.
Making a Red Velvet Cake is not only about the taste but also about creating something that looks stunning. This cake is perfect for birthdays, anniversaries, or any special occasion. With just a few ingredients, you can whip up a delightful dessert that everyone will rave about.
Ingredients
- 2 1/2 cups all-purpose flour
- 1 1/2 cups granulated sugar
- 1 teaspoon baking soda
- 1 teaspoon salt
- 1 teaspoon cocoa powder
- 1 1/2 cups vegetable oil
- 1 cup buttermilk, room temperature
- 2 large eggs, room temperature
- 2 tablespoons red food coloring
- 1 teaspoon vanilla extract
- 1 teaspoon white vinegar
- 8 oz cream cheese, softened
- 1/2 cup unsalted butter, softened
- 4 cups powdered sugar
- 1 teaspoon vanilla extract
Instructions
- Preheat the oven to 350°F (175°C). Grease and flour two 9-inch round cake pans.
- In a bowl, sift together flour, sugar, baking soda, salt, and cocoa powder. Set aside.
- In a separate mixing bowl, combine vegetable oil, buttermilk, eggs, food coloring, vanilla extract, and vinegar. Mix until well combined.
- Gradually add the dry ingredients to the wet mixture, stirring gently until just combined.
- Pour the batter evenly into the prepared pans and bake for 25-30 minutes, or until a toothpick inserted in the center comes out clean.
- Let the cakes cool in the pans for 10 minutes, then transfer to wire racks to cool completely.
- For the frosting, beat together cream cheese and butter until smooth. Gradually add powdered sugar and mix until fluffy. Stir in vanilla extract.
- Once the cakes are completely cooled, frost the top of one layer, place the second layer on top, and frost the top and sides of the cake.
- Decorate as desired and enjoy your beautiful Red Velvet Cake!
Oreo Cheesecake Cake
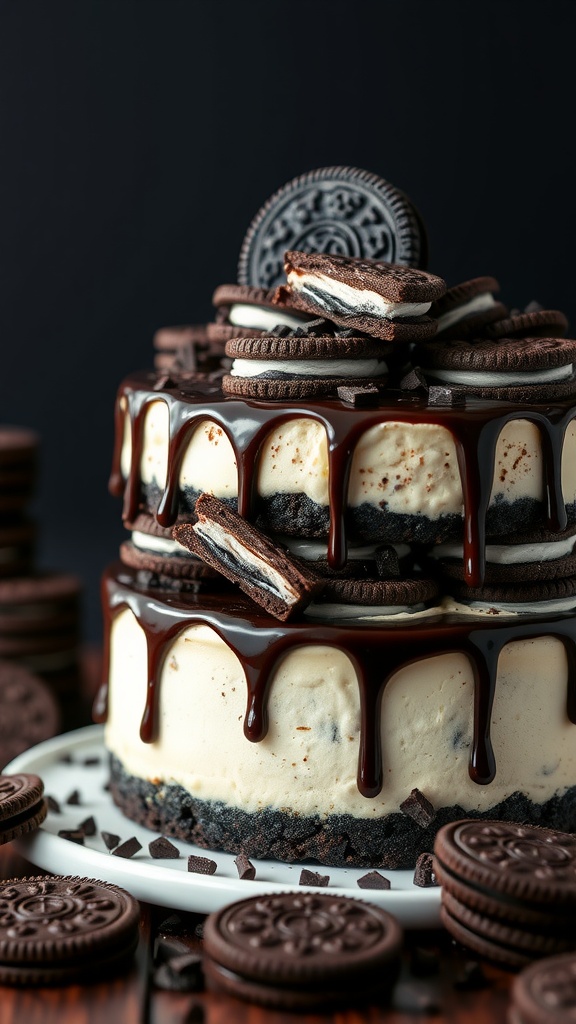
This Oreo Cheesecake Cake is a delightful combination of two beloved desserts: cheesecake and cake, all layered together for a sweet celebration. It’s rich, creamy, and has that classic Oreo flavor that everyone loves. The texture is smooth with a crunch from the Oreo crust, making it a delightful treat for any occasion, especially birthdays.
Making this cake is simpler than you might think! With layers of cheesecake filling sandwiched between moist chocolate cake, topped with chocolate ganache and crushed Oreos, it’s sure to impress your guests. You’ll love every bite of this sweet indulgence without spending hours in the kitchen.
Ingredients
- 1 1/2 cups Oreo crumbs
- 1/2 cup unsalted butter, melted
- 2 (8-ounce) packages cream cheese, softened
- 1 cup granulated sugar
- 2 teaspoons vanilla extract
- 3 large eggs
- 1 cup sour cream
- 1 cup heavy cream
- 1 cup semi-sweet chocolate chips
- Additional crushed Oreos for topping
Instructions
- Preheat your oven to 350°F (175°C). Grease and line the bottom of two 9-inch round cake pans.
- In a bowl, mix the Oreo crumbs and melted butter until combined. Press the mixture firmly into the bottom of each prepared pan.
- In a large mixing bowl, beat the cream cheese until smooth. Add the sugar and vanilla, mixing until well combined. Slowly add the eggs, one at a time, mixing after each addition.
- Mix in the sour cream until smooth, then pour the batter evenly into the two pans over the crust.
- Bake for 40-45 minutes until set. Let the cakes cool completely in the pans before removing.
- For the ganache, heat the heavy cream in a small saucepan until simmering. Remove from heat and add chocolate chips, stirring until smooth.
- Once the cakes are cool, layer them with cheesecake in between and pour ganache on top. Finish with crushed Oreos for garnish.
Rainbow Layer Cake
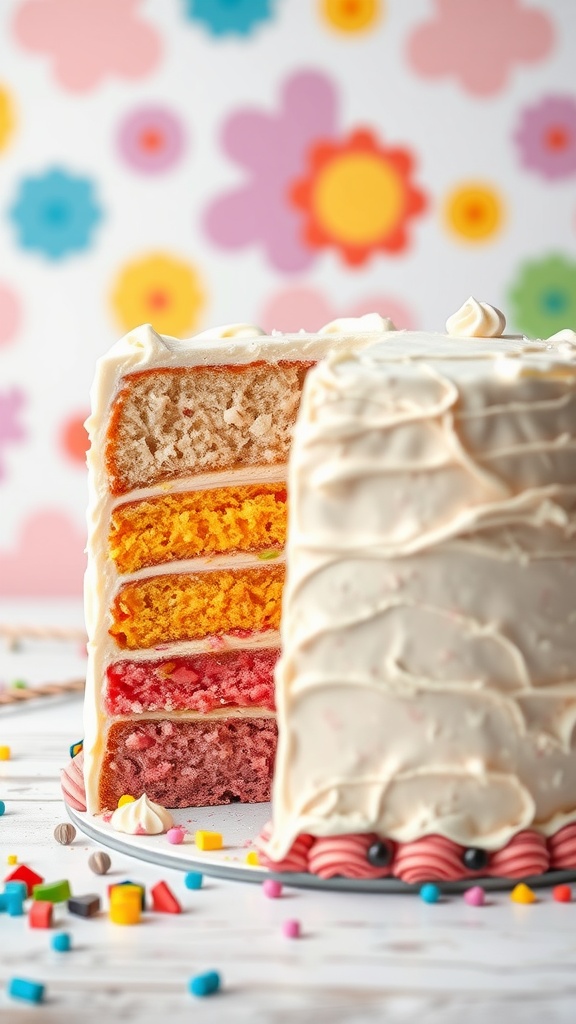
This Rainbow Layer Cake is a fun and vibrant treat that brings joy to any celebration. Each layer bursts with color and flavor, making it not only beautiful but also deliciously sweet. It’s a fantastic way to add a little color to your special day.
Making this cake is a straightforward process, perfect for bakers of all levels. With just a few steps, you’ll create a stunning centerpiece that will impress your guests. Grab your baking supplies, and let’s get started on this colorful delight!
Ingredients
- 2 ½ cups all-purpose flour
- 2 ½ teaspoons baking powder
- ½ teaspoon salt
- 1 cup unsalted butter, softened
- 2 cups granulated sugar
- 4 large eggs
- 2 teaspoons vanilla extract
- 1 cup milk
- Food coloring (red, orange, yellow, green, blue, purple)
- Frosting of your choice (buttercream works well)
Instructions
- Preheat your oven to 350°F (175°C) and grease six 8-inch round cake pans.
- In a bowl, mix flour, baking powder, and salt together. In another bowl, cream the butter and sugar until light and fluffy.
- Add eggs one at a time, followed by the vanilla extract. Then, gradually add the dry ingredients and milk, mixing until just combined.
- Divide the batter evenly into six bowls. Add a different food coloring to each bowl and mix well.
- Pour the colored batter into the prepared cake pans, layering them one by one. Bake for 20-25 minutes or until a toothpick comes out clean.
- Let the cakes cool completely before frosting. Stack the layers with frosting in between and cover the exterior with frosting. Decorate to your liking!
Pineapple Upside-Down Cake
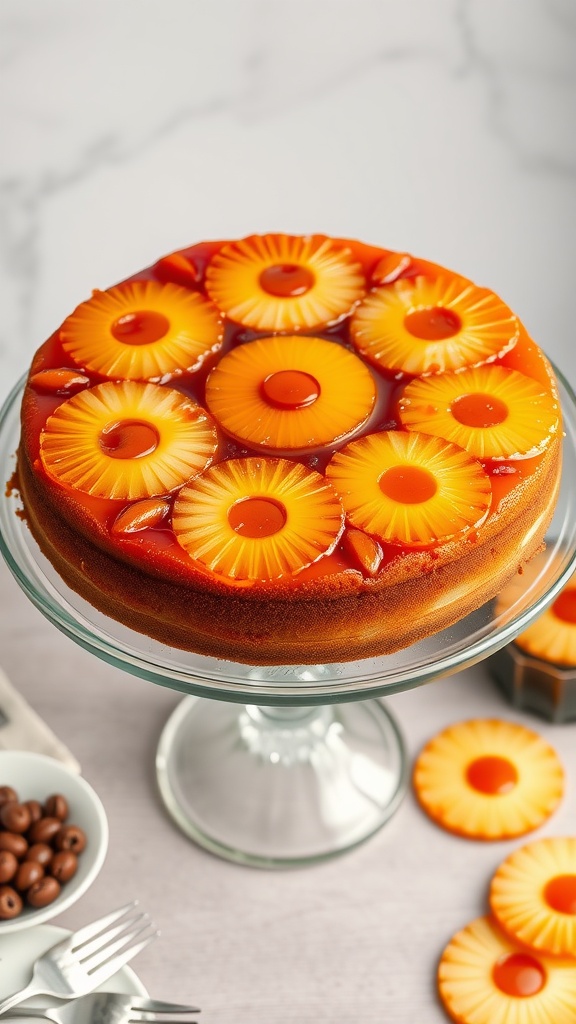
Pineapple Upside-Down Cake is a delightful twist on the classic birthday cake. This sweet treat features caramelized pineapple rings and maraschino cherries atop a buttery, moist cake. The combination of the sweet fruit and rich cake creates a delicious flavor that everyone loves. Plus, it’s pretty simple to whip up, making it perfect for any celebration.
When you flip the cake over, the beautiful topping is revealed, making it an eye-catching dessert for your birthday parties. It’s sure to impress your guests with its vibrant colors and delightful taste!
Ingredients
- 1/4 cup unsalted butter
- 1 cup brown sugar, packed
- 1 can (14 ounces) pineapple slices in juice
- Maraschino cherries
- 1 1/2 cups all-purpose flour
- 2 teaspoons baking powder
- 1/2 teaspoon salt
- 1/2 cup granulated sugar
- 2 large eggs
- 1 teaspoon vanilla extract
- 1/2 cup milk
Instructions
- Preheat your oven to 350°F (175°C). Melt butter in a 9-inch round cake pan. Add brown sugar and stir until combined.
- Arrange pineapple slices over the brown sugar mixture and place a cherry in the center of each pineapple ring.
- In a bowl, whisk together flour, baking powder, and salt. In another bowl, beat granulated sugar, eggs, and vanilla until fluffy. Gradually mix in the flour mixture, alternating with milk, until smooth.
- Pour the batter over the pineapple and cherries in the pan. Bake for 30-35 minutes or until a toothpick comes out clean from the center.
- Let the cake cool for 10 minutes, then carefully invert onto a serving plate. Serve warm or at room temperature!
Tiramisu Cake with Cocoa Dust
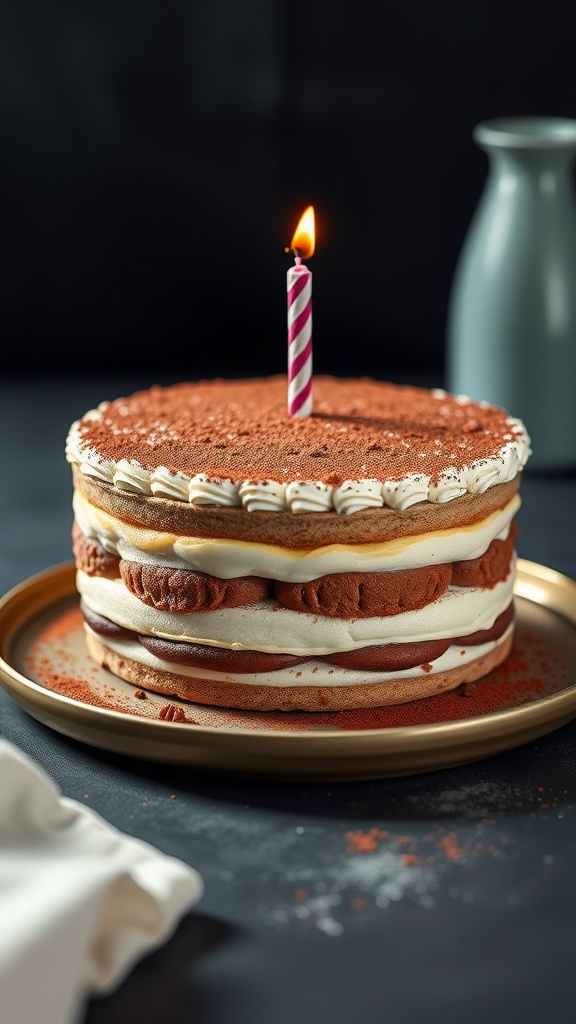
Celebrate special occasions with a delightful twist on a classic dessert: Tiramisu Cake with Cocoa Dust. This cake layers rich coffee-soaked cake with a creamy mascarpone filling, creating a treat that balances sweetness with a hint of coffee bitterness. The cocoa dust on top adds a touch of elegance and a slight bitterness that perfectly complements the sweet layers, making every bite a luxurious experience.
Making this cake is simpler than it appears. With just a few ingredients and straightforward steps, you can whip up this showstopper for any birthday celebration or gathering. It's a fantastic way to impress guests and indulge in a dessert that feels both special and comforting.
Ingredients
- 1 ½ cups all-purpose flour
- 1 cup granulated sugar
- 1 teaspoon baking powder
- ½ teaspoon baking soda
- ¼ teaspoon salt
- ½ cup unsalted butter, softened
- 2 large eggs
- 1 teaspoon vanilla extract
- ¾ cup strong brewed coffee, cooled
- 8 oz mascarpone cheese
- 1 cup heavy cream
- ¼ cup powdered sugar
- 2 tablespoons cocoa powder
Instructions
- Preheat the oven to 350°F (175°C). Grease and flour two 9-inch round cake pans.
- In a large bowl, combine flour, sugar, baking powder, baking soda, and salt. Add softened butter, eggs, and vanilla extract. Mix until smooth.
- Gradually add the cooled coffee, mixing until well combined. Pour the batter evenly into the prepared cake pans.
- Bake for 25-30 minutes or until a toothpick inserted in the center comes out clean. Let cakes cool in the pans for 10 minutes, then transfer to wire racks to cool completely.
- In a separate bowl, whip the heavy cream and powdered sugar until stiff peaks form. Gently fold in the mascarpone cheese until smooth.
- Once the cakes are cool, layer one cake on a serving plate. Spread a generous layer of the mascarpone mixture on top, then place the second cake on top.
- Spread the remaining mascarpone mixture over the top and sides of the cake. Dust with cocoa powder before serving.
Matcha Green Tea Cake
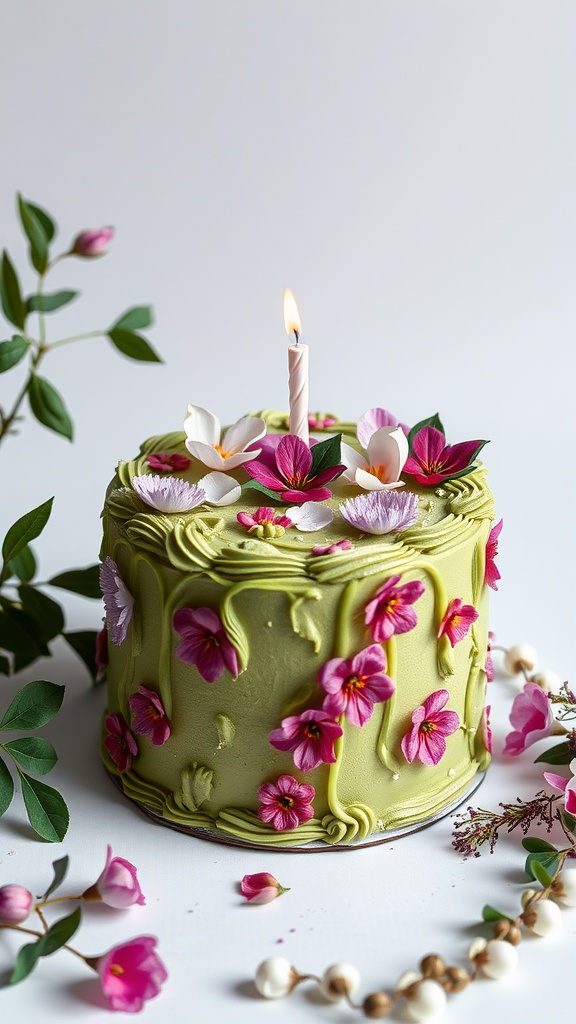
Matcha green tea cake is a delightful treat that combines the earthy flavor of matcha with the sweetness of a classic birthday cake. Its vibrant green color is eye-catching, making it a perfect centerpiece for any celebration. The cake is light, fluffy, and offers a unique twist that’s sure to impress your guests.
This recipe is simple to follow and can be made in a few easy steps. The balance of matcha and sweetness makes each bite a satisfying experience, whether you are a matcha lover or just looking to try something new!
Ingredients
- 2 cups all-purpose flour
- 1/2 cup granulated sugar
- 1/4 cup matcha green tea powder
- 1 tablespoon baking powder
- 1/2 teaspoon salt
- 3/4 cup unsalted butter, softened
- 1 cup milk
- 3 large eggs
- 1 teaspoon vanilla extract
- 1 cup powdered sugar (for frosting)
- 1/4 cup unsalted butter (for frosting)
- 2 tablespoons milk (for frosting)
- 1 tablespoon matcha green tea powder (for frosting)
Instructions
- Preheat the Oven: Preheat your oven to 350°F (175°C) and grease two 9-inch round cake pans.
- Mix Dry Ingredients: In a bowl, whisk together flour, matcha powder, baking powder, and salt.
- Cream Butter and Sugar: In another bowl, beat the softened butter and granulated sugar until light and fluffy. Add eggs one at a time, mixing well after each addition. Stir in vanilla extract.
- Combine Mixtures: Gradually add the dry ingredients to the butter mixture, alternating with milk. Mix until just combined.
- Pour and Bake: Divide the batter evenly between the prepared pans and bake for 25-30 minutes, or until a toothpick comes out clean. Allow cakes to cool in the pans for 10 minutes before transferring to wire racks.
- Prepare the Frosting: Beat together powdered sugar, softened butter, matcha powder, and milk until smooth and creamy.
- Assemble the Cake: Once the cakes are cool, spread frosting between the layers and over the top and sides of the cake. Decorate as desired, and enjoy your delicious matcha green tea cake!
Comments
Post a Comment